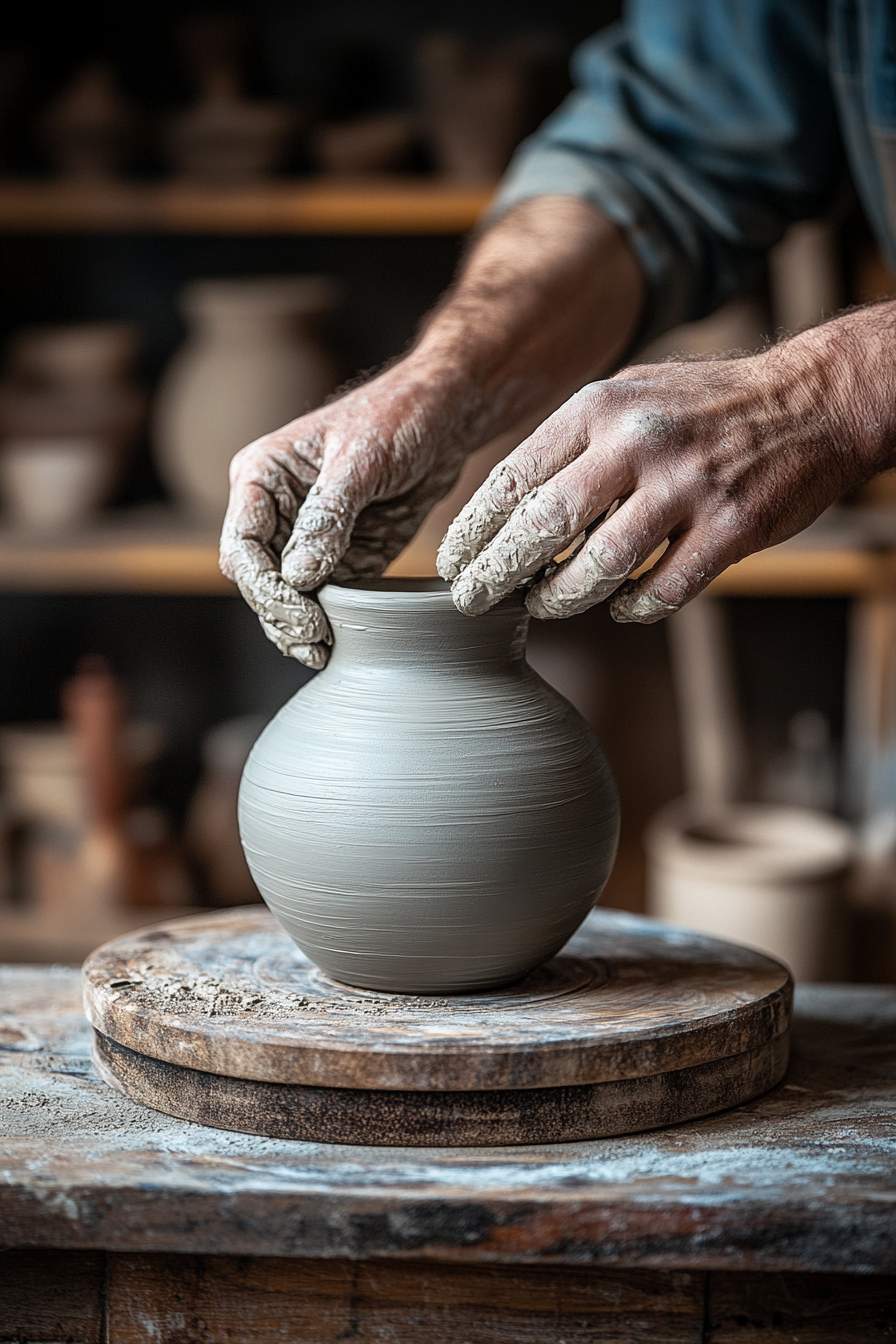
Hand-Building Techniques in Ceramic Art – Coil, Slab, and Pinch Methods Explained
Ceramic art, a craft steeped in millennia of human creativity, has seen a renaissance in recent years. While wheel‑throwing often grabs the spotlight, hand‑building techniques like pinch, coil, and slab offer unique expressive potential. These techniques are accessible, intimate, and versatile—perfect for creating wall art, statement vases, and sculptural showpieces that resonate both visually and emotionally. This article explores these methods in depth, combining technique explanations with striking examples, practical tips, and artistic insight to guide both newcomers and experienced ceramists.
Exploring the Pinch Method
The Essence of Pinching
The pinch method—shaping clay by gently pinching it between fingers—is one of the most immediate and personal ways to work with clay. It requires no tools, just your hands and a lump of clay. Ideal for small to medium forms, pinch pots, pinch vases, and sculptural details allow for intimate, organic results, built directly from touch and intuition.
Materials and Early Steps
- Clay choice: Low‑ to mid‑fire earthenware or stoneware are forgiving for pinching. Start with a wedged, uniform chunk for best consistency.
- Minimal tools: While finger power is primary, small wooden ribs or rubber kidney tools help refine walls and smooth the surface. A damp sponge is perfect for removing fingerprints and refining edges.
Creating a Pinch Vase
- Begin with a golf‑ball‑sized chunk, pressing a slightly off‑center hollow with your thumb.
- Gradually pinch, rotate, and press to expand walls, keeping thickness uniform.
- Use ribs to smooth and refine once shape is established.
- Let it stiffen to leather‑hard before trimming the base or shaping the rim.
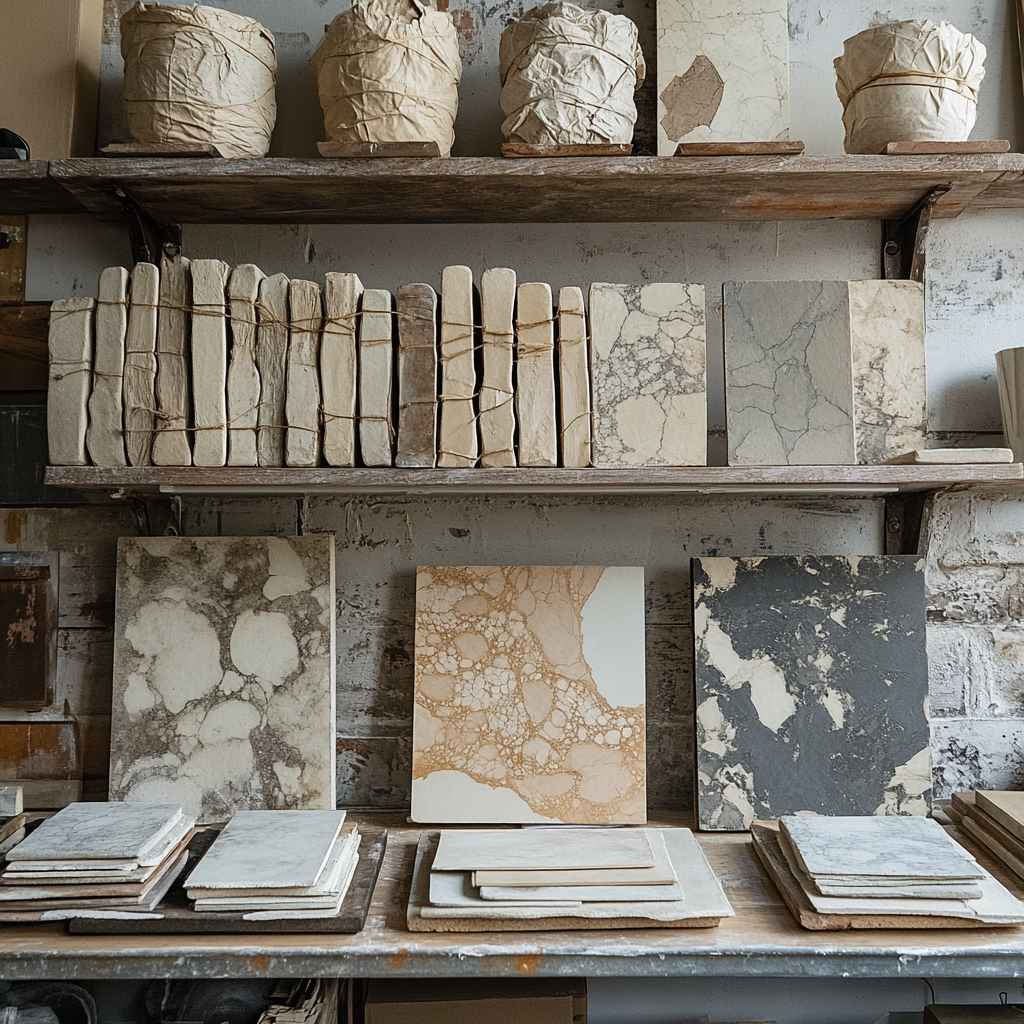
Example – Organic Ceramic Wall Tile
Imagine a set of three pinch‑formed wall tiles with flowing, fingerprint‑inspired impressions. Each tile features irregular rim shapes and textured interiors sealed with glossy celadon glaze. Mounted in a trio, they evoke natural topography—subtle, tactile, and soothing.
Embracing the Coil Technique
Building with Coils
Coiling involves rolling clay into ropes and layering them to build up form. Unlike pinching, it allows the construction of larger, more complex structures like statement vases, sculptural vessels, or free‑form art pieces, while retaining an aesthetic affinity to ancient pottery traditions.
Preparing for Coiling
- Clay selection: Mid‑ to high‑fire clays handle larger structures better.
- Tools and supports: A pointing tool for slip, ribs for smoothing, a banding wheel to assist rotation during building, and starch or plastic underlay to protect soft clay.
Crafting a Decorative Coiled Vase
Coiled vases can be classic or modern, symmetrical or free‑form. You begin with a base disk, then build coils in succession. Blend coils with slip, smooth them into one surface, or leave them exposed for a textured aesthetic.
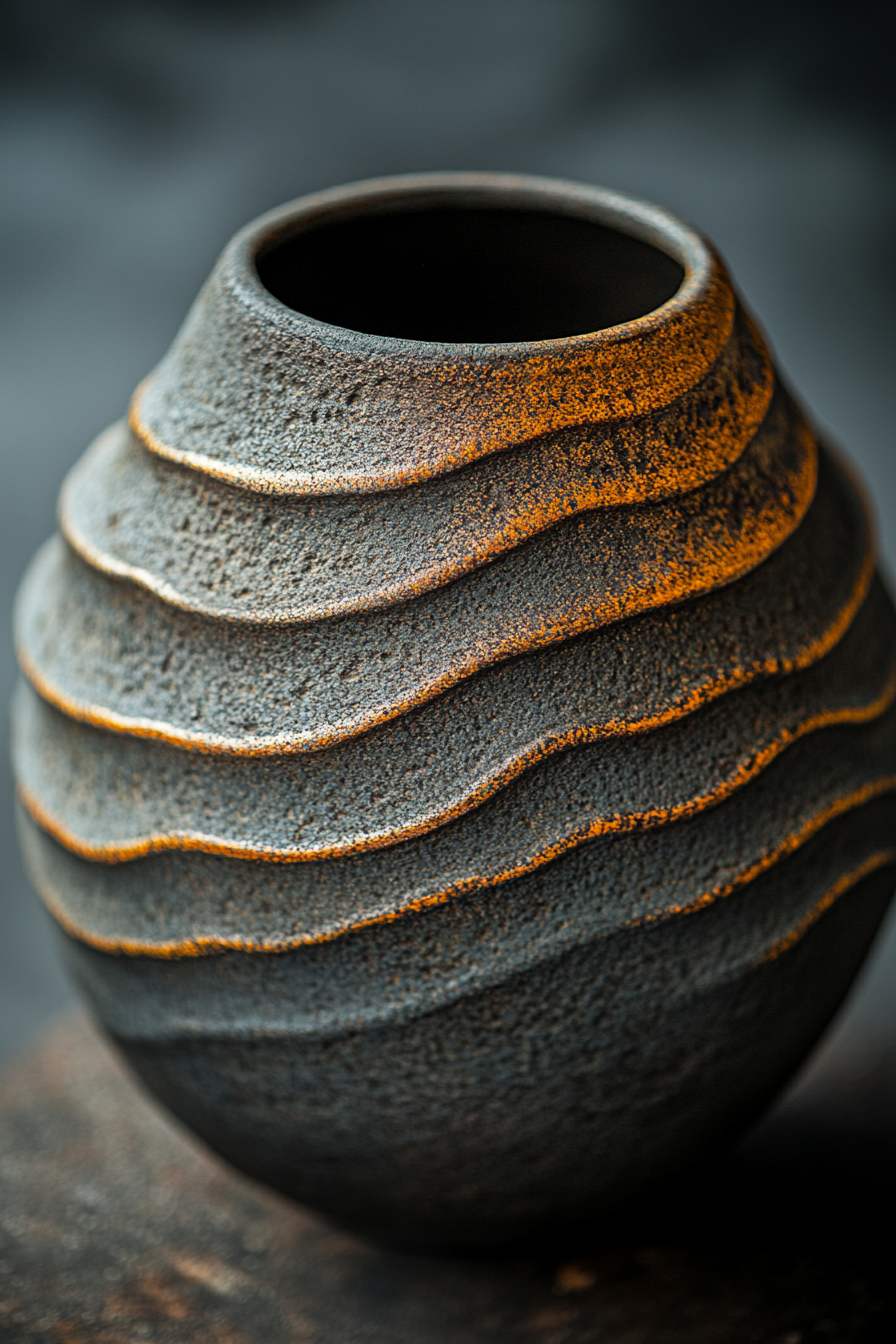
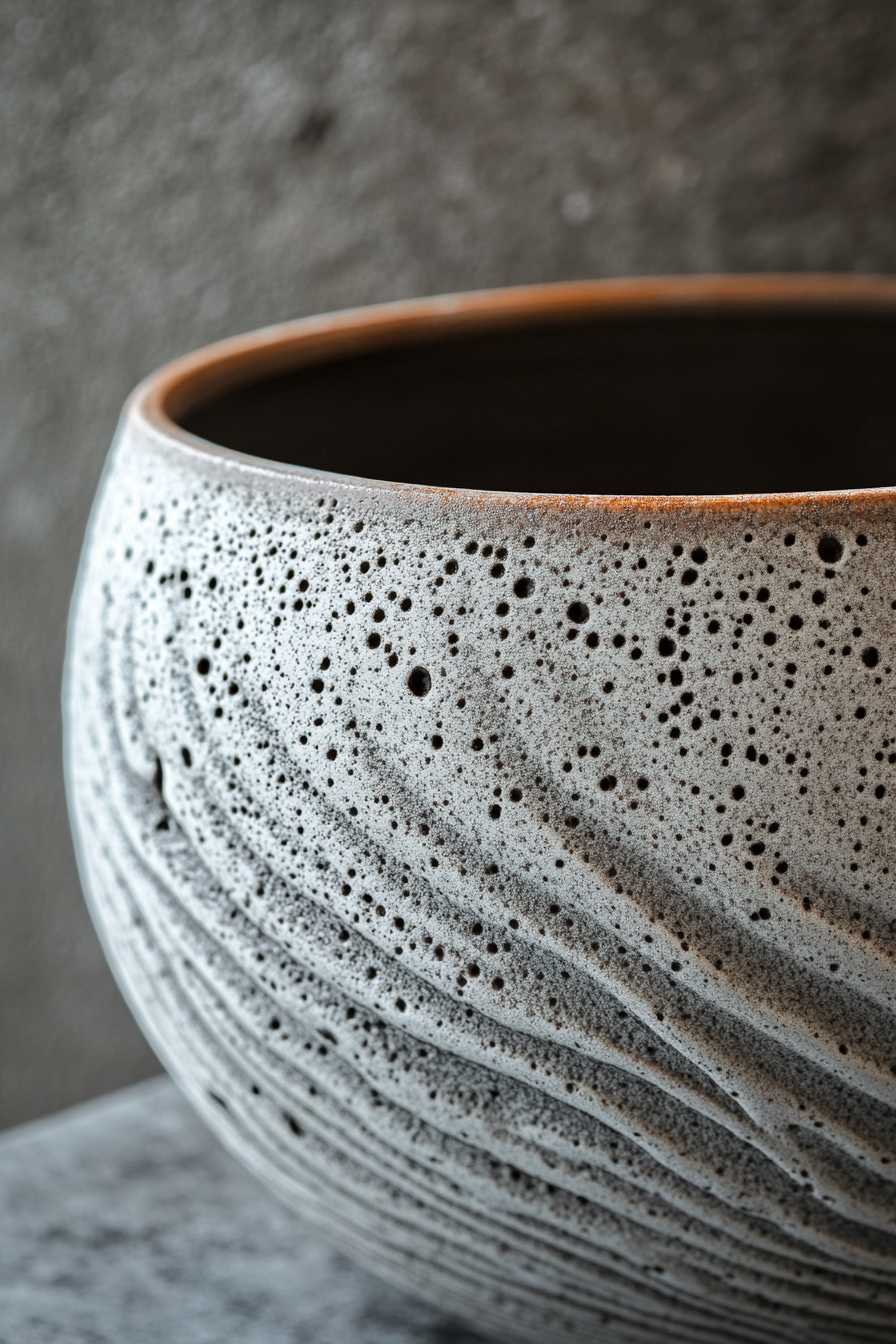
Example – Statement Coiled Vase
Visualize a 40 cm‑high vase built entirely from 3 cm thick coils. The artist leaves ridge lines intact, emphasizing their form. The glaze is matte black inside and ochre outside, highlighting coil texture. This vase becomes a floor standing sculpture—stark yet warm.

Harnessing the Slab Technique
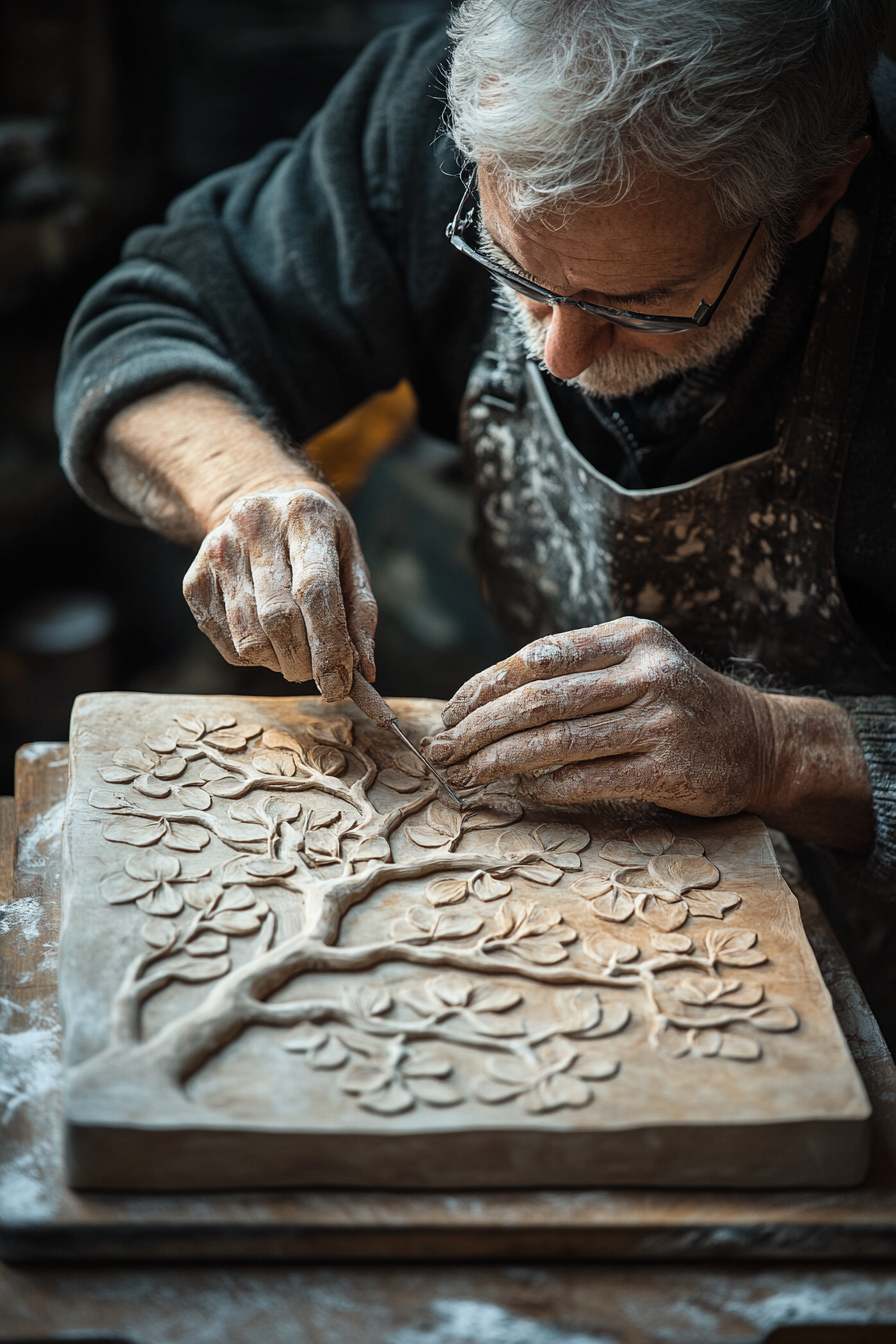
Flat Clay for Sculptural Design
Slab building is perfect for architectural forms and industrial‑inspired designs. Roll out slabs, cut with templates, and assemble them—staple approach for constructing wall panels, box forms, plates, or angular vases.
Essential Tools and Processes
- Slab roller or rolling pin with thickness guides or wooden rails.
- Templates/edge guides for clean, straight cuts.
- Scoring and slipping for strong joins; often used with reinforced internal supports (e.g., newspaper) and careful drying to prevent warping.
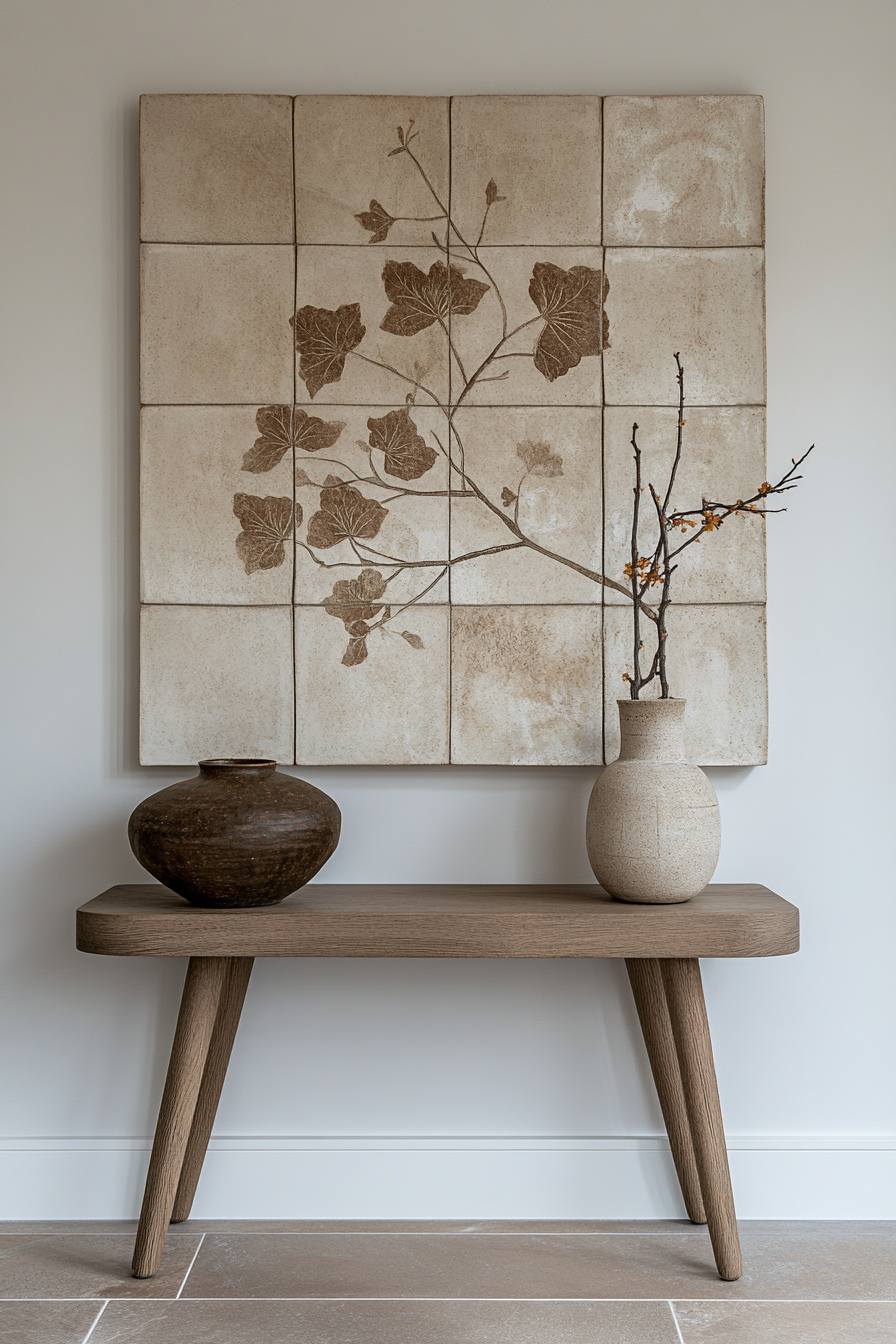
Designing a Slab Wall Panel
- Create 3 mm slabs, then cut 30 × 30 cm squares.
- Score edges, apply slip, and join them to form a grid of nine panels.
- Carve patterns—geometric, botanical, or narrative—using sgraffito or stamps.
- Reinforce from the back during leather‑hard stage, then bisque‑fire.
- Underglaze or glaze selectively to create matte and glossy contrasts in raised areas.
Example – Layered Ceramic Panel
A wall‑mounted ceramic mural composed of six overlapping slabs. Each slab is etched with abstract leaf silhouettes and tinted with moss green underglaze highlights. The layered effect creates soft shadows—an artful depth that changes with light.
Fusing Techniques in One Work
Allowing pinch, coil, and slab methods to converse within a single piece unlocks new creative territory. A vase with a slab‑built base can feature a coiled midsection and pinch‑accented handles. Similarly, wall pieces can combine slab backgrounds, coiled embellishments, and pinched decorative motifs.
Example – Integrated Sculpture
Envision a 60 cm hanging sculpture: two slab‑constructed panels form the background, coiled vines meander across, and pinch‑formed flower buds spring from nodes. Fired in smoke kiln for atmospheric surface effects, it becomes an immersive piece representing natural growth.
Surface Treatments and Firing
Textural Finishing Techniques
- Burnishing compresses clay particles for a satin sheen.
- Sgraffito reveals contrasting underglazes through scratched designs.
- Stamping or impressing with organic textures adds pattern.
Glazing and Firing Choices
- Low‑fire (earthenware) for soft glazes—ideal for decorative pieces.
- Mid‑ to high‑fire stoneware for durability and matte stone‑like finishes.
- Raku or smoke firing imbues surfaces with unpredictability and smoky patinas.
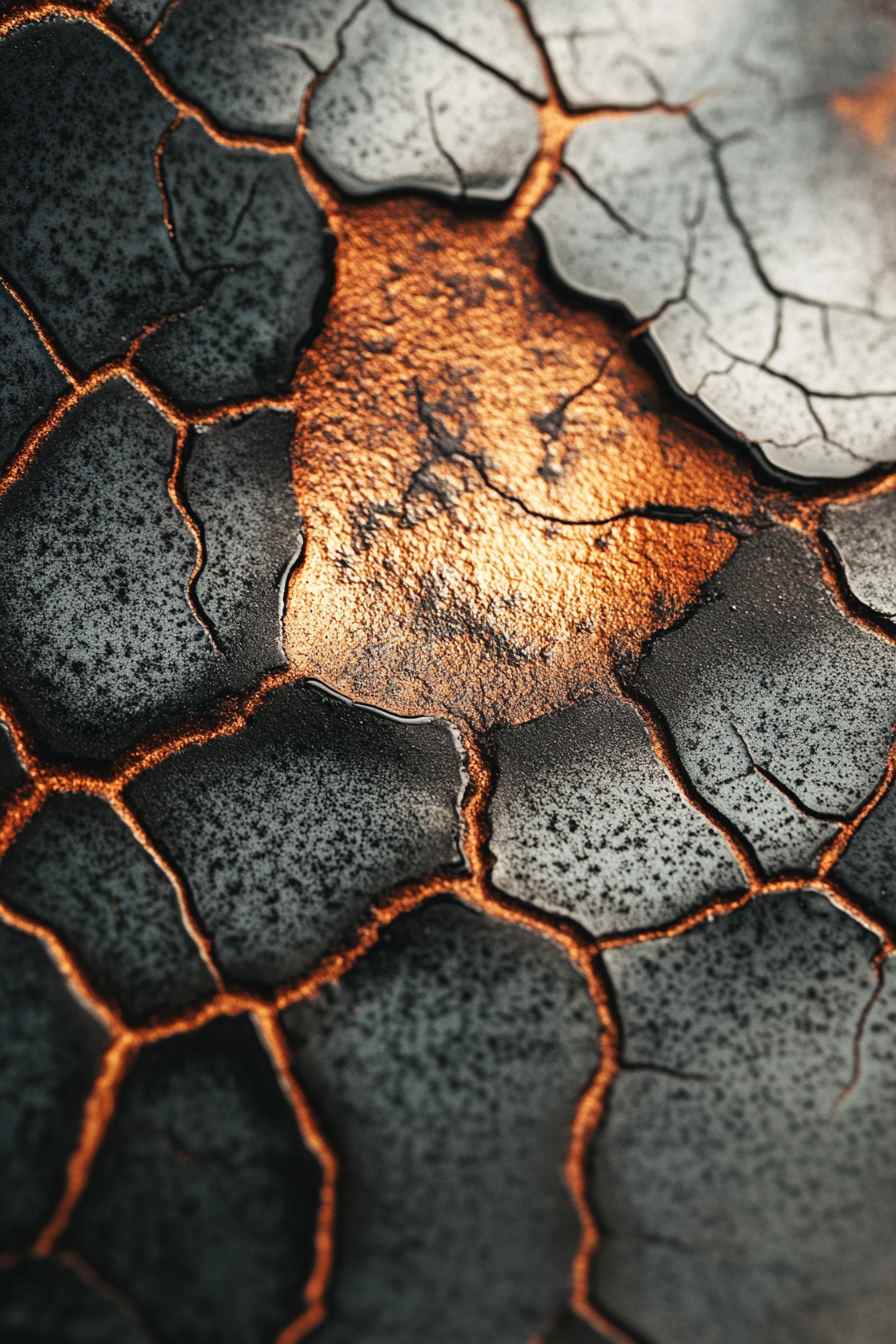
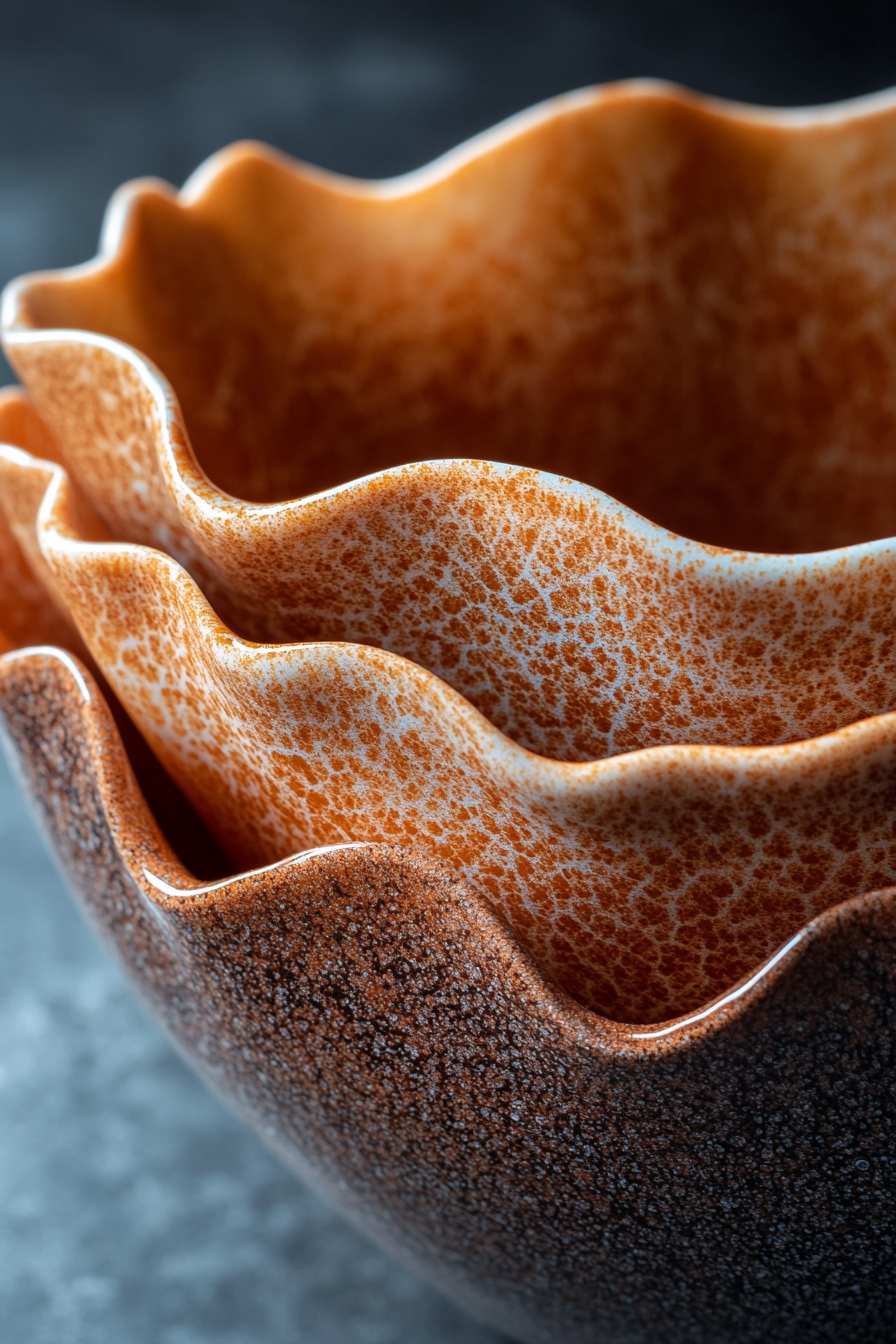
Example finishes vary dramatically—from glossy forest glazes highlighting coiled ridges, to matte black slips over pinched forms that accentuate shadows and tactile qualities.
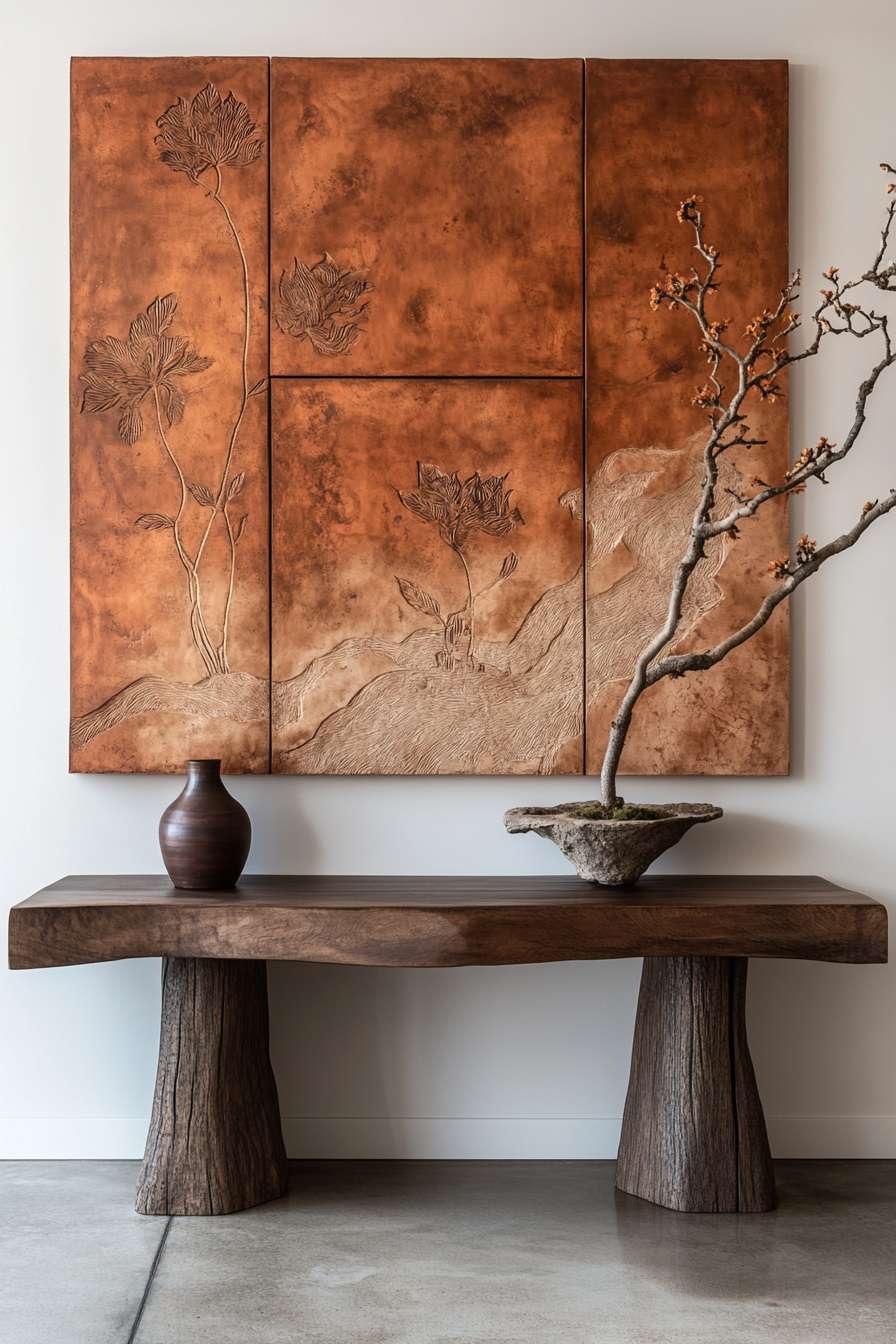
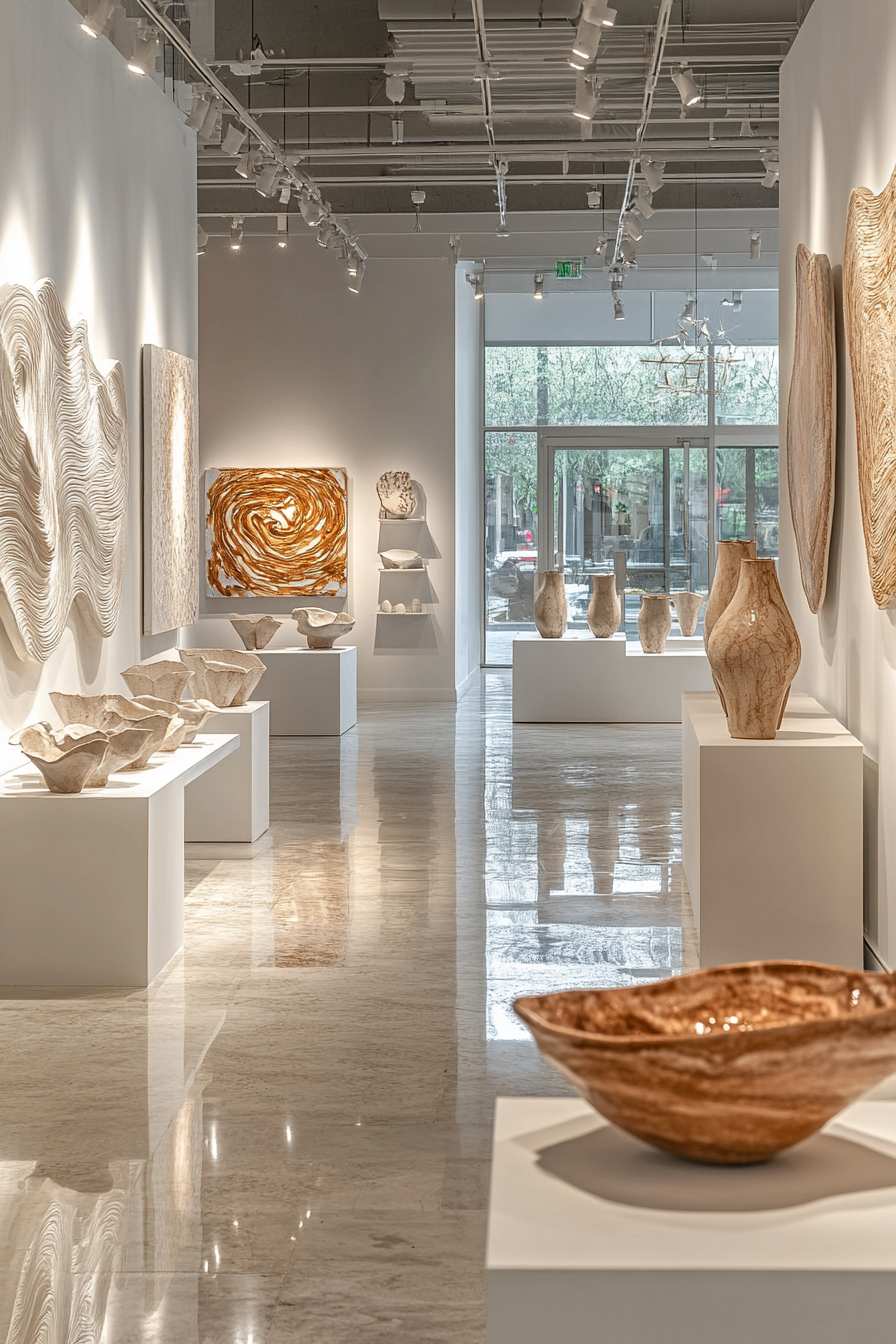
Ceramic Showpieces in Contemporary Settings
Hand‑built ceramics now feature prominently in galleries, boutique hotels, and eco‑design spaces. Wall art panels, sculptural vases, and tabletop installations become conversation starters. Collectors prize the emotional feel of hand‑worked surfaces—where each mark tells a story. Functional pieces that double as art offer utility with soul, fitting current trends toward slow living and sustainable craftsmanship.
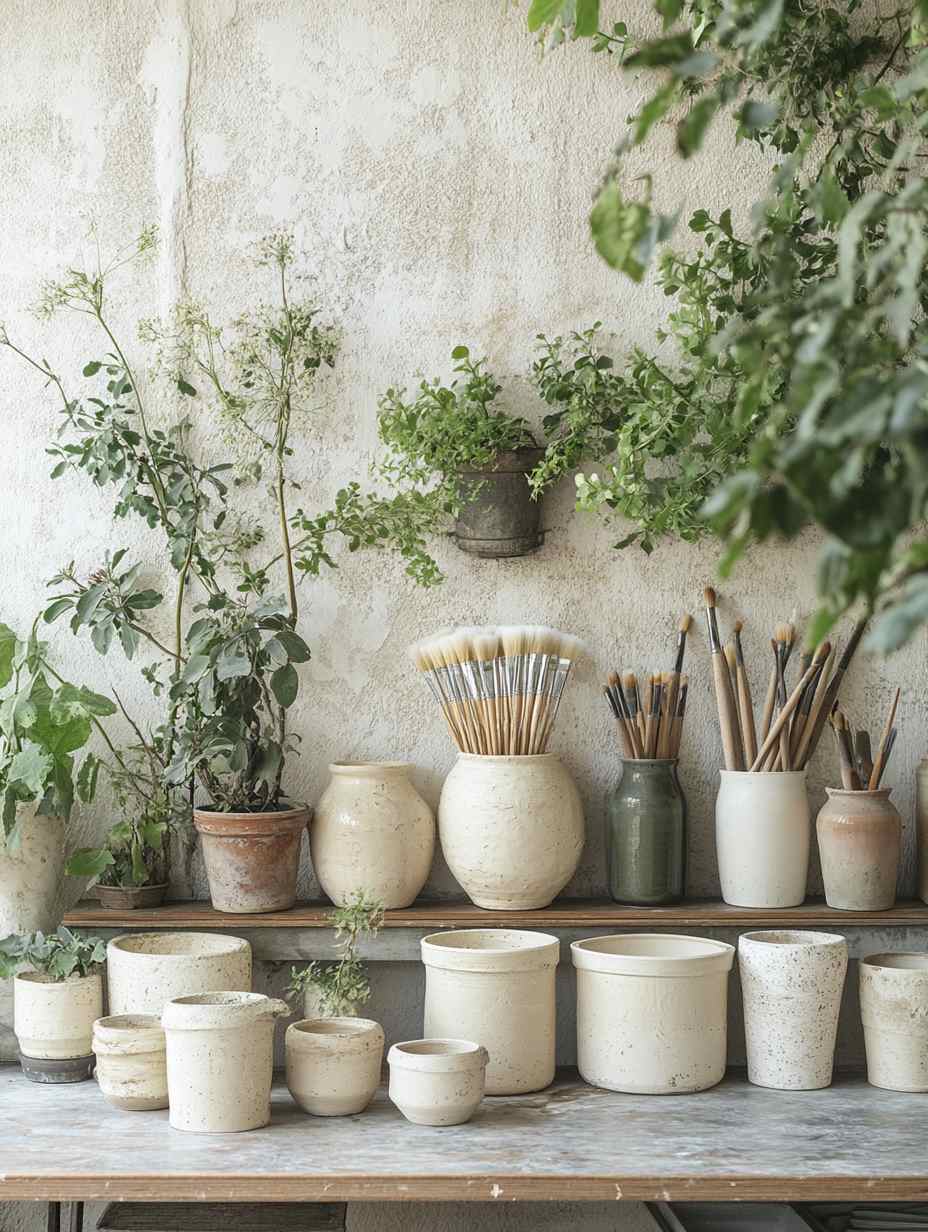
Practical Studio Tips
- Workspace: dedicated area with moist-box shelving for clay storage.
- Mist common mistakes:
- Too‑thin walls prone to cracking—check thickness regularly.
- Skipping proper scoring/joining—creates weak bonds.
- Over‑drying slabs leads to warping—rule of thumb is drying evenly, covered.
- Resources: Workshops (local studios or online), reference books like The Complete Guide to Wheel‑Free Pottery by Jon Bodman, and Instagram/Facebook groups like “BuildnClay.”
Sustainability and Mindful Crafting
Hand‑building aligns with mindful art practice—slow, contemplative, and materially honest. Using reclaimed or specked local clays, collecting glaze materials sustainably, and valuing the imperfect marks of hand work all contribute to an eco‑art ethos. Creating becomes less about perfection and more about presence.
Conclusion
Pinch, coil, and slab methods aren’t just alternatives to wheel‑throwing—they are gateways to creative freedom, one‑of‑a‑kind expression, and material storytelling. They invite you to engage physically, emotionally, and spiritually with clay. Whether you’re crafting a delicate pinch vase, a sculptural coil vessel, or an architectural slab mural, each technique has unique power. Begin with a simple pinch pot, then let that evolve—through coils, slabs, and creative combinations—into your own style of ceramic art.
FAQ
What is the best clay for hand‑building?
For pinch and coil, low‑ to mid‑fire earthenware or stoneware is ideal—flexible and forgiving. For slabs and larger pieces, mid‑ to high‑fire stoneware minimizes warping and is more durable.
Can hand‑building be combined with wheel‑throwing?
A small pinch pot may take under an hour. A coiled or slab piece could require several days—for building, drying, refining, and firing.
How long does it take to make a hand‑built vase?
A small pinch pot may take under an hour. A coiled or slab piece could require several days—for building, drying, refining, and firing.
What causes cracks in hand‑built ceramics?
Thin walls, uneven drying, or poor joins. Keep walls 6–10 mm thick, score and slip every join, and cover pieces loosely if drying too fast.
Which glazes work best for textured surfaces?
Matte or satin glazes highlight texture without pooling in recesses. Use tinted underglazes before textural work to ensure color remains after glaze application.
Any tips for ceramic beginners?
Start small! Practice pinch pot shapes to get comfortable with clay. Experiment with coil walls on simple forms before trying large pieces.