Glass Pyrography – Amazing Art of Wood Burning
GLASS PYROGRAPHY or SOLAR PYROGRAPHY or pyrography using magnifying GLASSES is a challenging yet versatile way of creating pyrography artworks.
For doing this pyrography, you must work outdoors from where you can get enough sunlight. You can carefully burn along your design on the wood using the heat produced by the converged sunrays bent by magnifying glass. But make sure to wear protective goggles and clothes because you can burn yourself easily if not being careful.
Most of the pyrography hobbyist know only the basic pyrography art. But doing it via magnifying glasses is a new horizon for them. So when did it all begin? How do you use such a glass for pyrography? Can you make your own tool to burn wood? I will answer them all in this article. You will understand this just seeing this video.
History of Burning With Lenses
- Before heading to glass (or solar) pyrography, let’s turn back time for a while and dive into the history of burning using this material.
- Because just when you think modern-day people are more intelligent, wait till you find out how people of ancient times used the power of the sun through glass or lenses for their purposes.
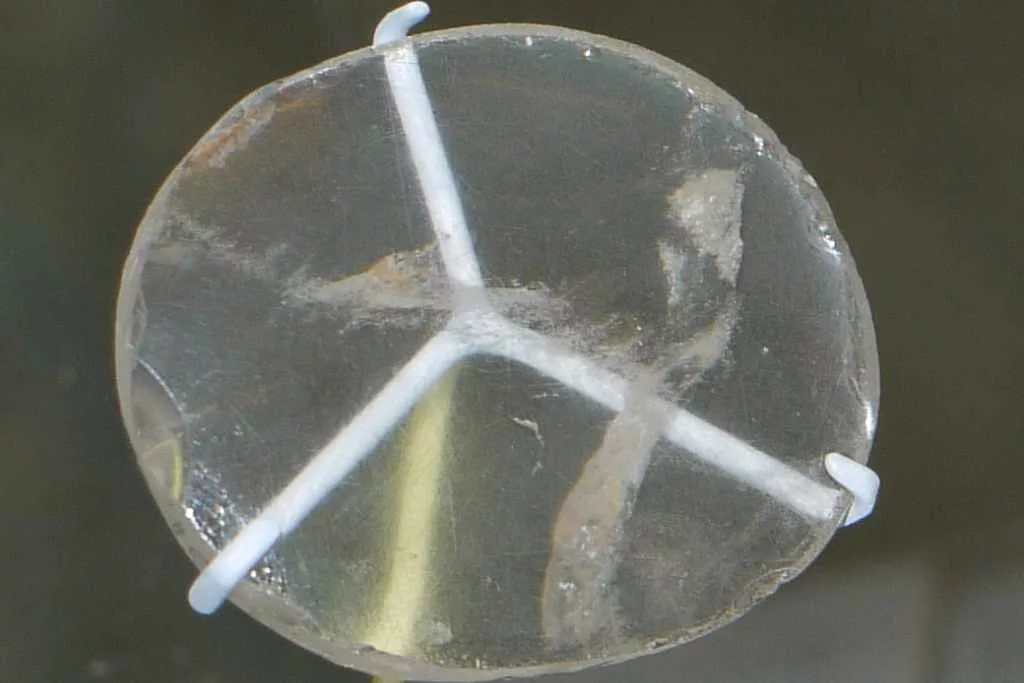
- The proof of such a round shaped lens was found in Iraq, which is believed to be from the 8th century BC.
- It is called the Assyrian Nimrud Lens, and it is also known as the oldest lens on Earth.
- Unfortunately, there is no known proof of this particular glass being used for burning. But more evidence was later found of glasses and mirrors being used as burning tools.
- However, it is believed that the Greeks would use these lenses to direct the sunlight toward things like straw and wood, to burn them, or create engravings. And not just for engraving. History shows that the power of the sun was also used for battles and war as a defense weapon.
- Over time, people started to believe that lighting things with glasses is something magical or sacred. As a result, they began using lenses to set off the sacred fire during religious ceremonies.
- Saint Boniface used such a crystal lens to magnify the sun’s rays to set off the new fire of Holy Saturday. And this tradition went on during the Easter celebration from the 7th to the 16th century.
- And several centuries later, science stepped in, bringing advanced changes in what has been used since ancient times. Now, the concept of burning lenses is used to make solar glasses used in buildings and solar furnaces to keep the sun’s rays at bay in high-temperature areas.
- And finally, instead of using it as a weapon, creative people have moved the use of such lenses for wood burning or pyrography artwork. It is also known as solar pyrography.
How Pyrography Is Done With Magnifying It?
- Solar pyrography is the art of wood burning using the sun’s rays through a convex lens, alternatively known as a magnifying glass.
- This device is known for converging the rays, via refraction, in its glasses and intensifying the rays into a strong beam.
- So when you direct the lens to something under the sun, it will transfer the heat to the object you are focusing on.
- The tinier the focus point you offer, the higher temperature it will produce and burn faster.
- Using this heat transfer, pyrography artists now use a magnifying glass for wood burning. It is cost-effective and the most environment-friendly option you can find as there is no chemical or no electricity is used in this process.
How to Do This?
So, how do you do solar pyrography? If you don’t know, here is a simple step-by-step guide to help you out.
Things You Will Need
- Safety goggles, gloves, clothes, sunscreen, etc.
- Printed design/design template
- Carbon/graphite paper
- Pencil
- Masking tape
- Magnifying glass
- paint/sealant (optional)
Process Steps
Step 1: Choose Your Design
Do you have a design or pattern in mind? Make sure you know what you want to burn on the wood because it will help you get the job done quickly.
And the best way to do solar pyrography as a beginner is to get the design or template printed before trying to burn wood with the magnifying glass. Because wood burning with this device is quite challenging.
Step 2: Transfer/Draw Your Design
If you have a printed design or a pyrography template, you need to transfer it onto the wood piece you want to burn. Place your design paper on the wood with carbon or graphite paper underneath the template.
Then use a pencil to trace over the printed design to transfer it onto the wood. You can also draw directly on the wood using a pencil instead of any template.
Step 3: Wear Safety Equipment
Pyrography with anything comes with hazards, whether it is an ancient poker, a modern burner tool, or even a magnifying glass. Besides, you should be working in the sun to do solar pyrography.
So make sure to wear safety glasses to protect your eyes from the magnifying rays. You can also wear protective clothes and gloves, and don’t forget to wear sunscreen.
Step 4: Burn With Magnifying Glass
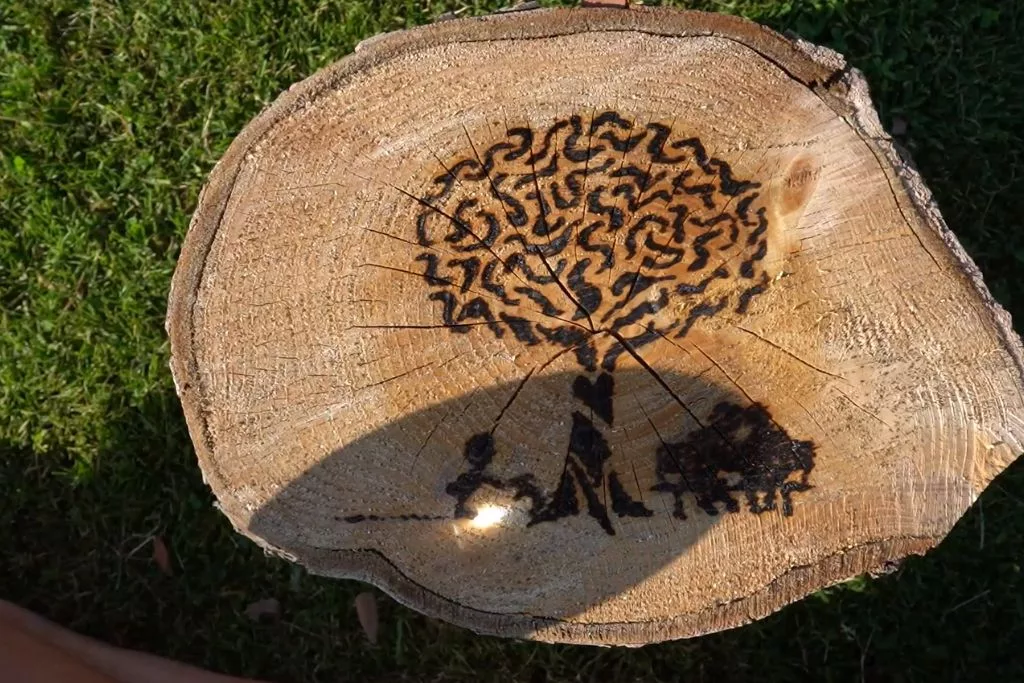
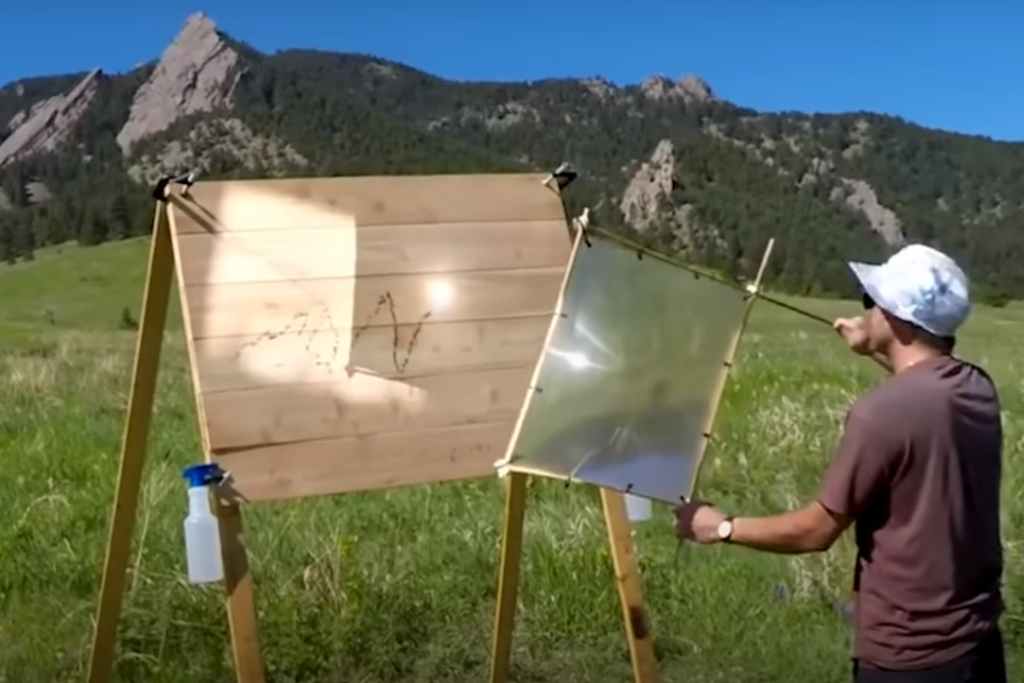
The best way to burn with it is to place your wood piece in a 45°-90°. But that is not mandatory, as you can place it at any angle based on your working comfort and the sunlight’s direction.
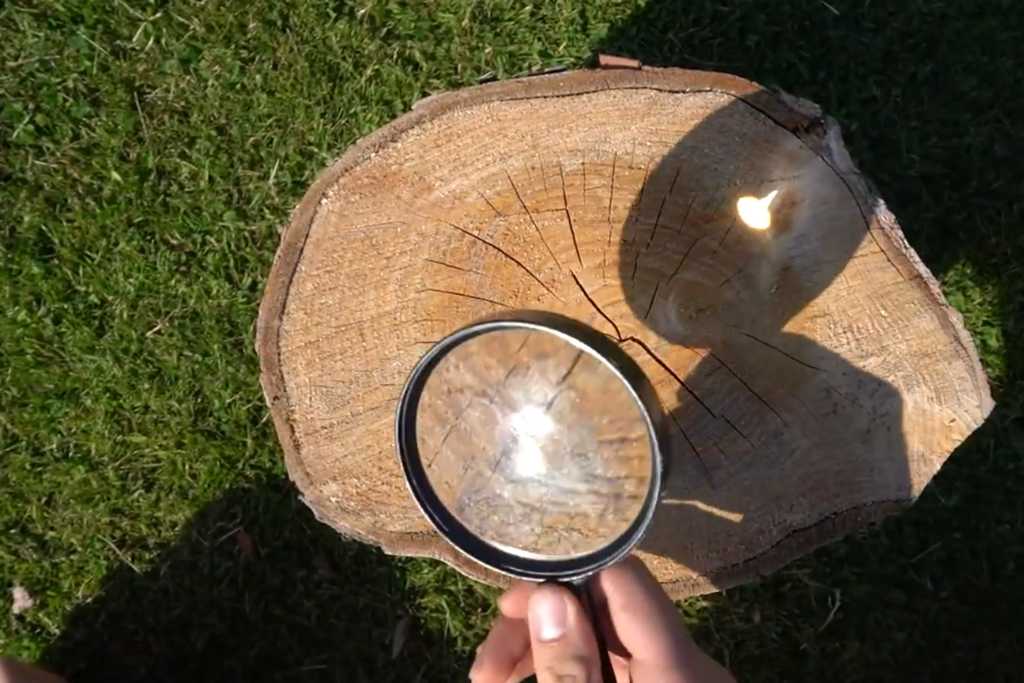
Then hold the magnifying glass in your hand and wait for it to intensify the sun’s rays and create heat. Focus on the beam reflecting through the glass on your wood piece and burn carefully over your transferred design or drawing.
Watch this video, you can think of selling magnifying glass wood burn art pieces.
Step 5: Paint And Apply Sealant (Optional)
Once you are done with wood burning, you can apply paint to add various color to your project. And you can make the design and paint more durable by applying a good-quality sealant or finish. However, this is entirely optional, and you can skip it if you want to.
What Type Of Magnifying Glass Is Best For Solar Pyrography
Based on the glass’s optical surface, there are several types available. But only the ones that collect parallel rays and can create a precise focal point are used for this purpose. These are called convex lenses. And when you hold such a glass against the sun and hold it on the spot of the object for too long, it can easily catch fire.
However, here, you are not using a magnifying glass to set fire onto the wood. You will have to use a controlled method to ensure you do not over burn the wood. And that is why it is essential to know what type of lens you should use.
Use Lightweight Glass
Magnifying glasses are not that heavy, but it can feel like it when you keep your arm in the same position for a long time. Burning wood with a magnifying glass can take an awfully long time, especially if you are a newbie. So I suggest going with lightweight glass.
Lens Thickness And Focal Length
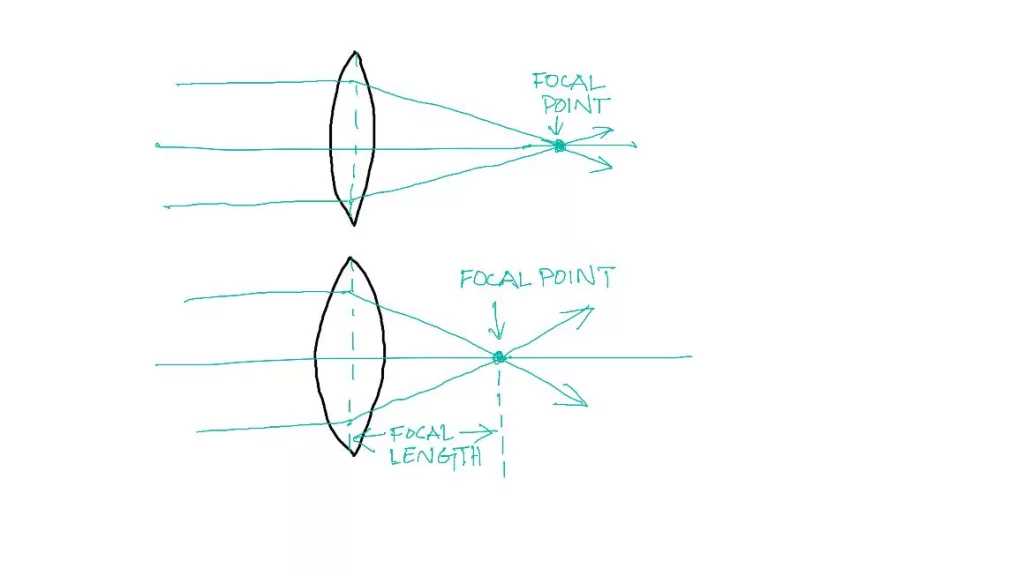
Its thickness plays a vital role in its focal length and the user’s ease. When you use thicker one, it has a shorter focal length, which means you have to hold the hand lens closer to the wood piece to burn it.
On the other hand, thinner ones have longer focal lengths. Since the focal length will put a distance between the glass and wood piece, you will have to hold the glass higher or at a distance to work. And it will make focusing on the design more challenging.
Lens Diameter and Energy Density
The glass’s focal point largely depends on the lens’s diameter, literally. The lens gathers all the energy from the sun and passes it through a single point of diameter. As a result, the heat it creates can easily burn things.
So as you might have guessed, the larger diameter the lens has, the more energy the lens will store. As a result, the glass will offer more heat and burn wood more quickly.
How to Make a DIY Solar Pyrography Tool
There is really no such a DIY solar pyrography tool. I mean, you can just hold your magnifying glass in hand and burn wood. However, you can make something to make the task more comfortable, as holding something in a position for too long puts so much stress on your arms.
So here is how you can make your own pyrography tool.
Things You Will Need
- A cardboard tube
- Pencil
- Ruler/measurement tape
- Masking tape
- Paper cutter
- A magnifying glass
How To Make
- Use the ruler or measurement tape to measure similar distances on the opposite sides of the cardboard tube.
- Use a pencil to draw a thick circle on both sides to mark the points.
- Now you can either use a paper cutter to cut the circles open or you can use the magnifying glass to burn a hole on the circle.
- Then slide the magnifying glass’s handle through the holes. You can use masking tapes to ensure the glass stays in place.
- The tube will act as your handle, and instead of holding your hand higher, you can hold the glass higher more easily.
- Now check the focal point by holding the cardboard tube under the sun. If it is making you hold the tube higher than necessary, you can use the cutter or a saw to cut it shorter.
EndNote
As kids, many of us messed around with magnifying glasses to burn paper and toys or create sunbeams to annoy others. Little did we know that this same game can help burn wood to create pyrography. And with other methods, pyrography via glass or solar pyrography is one of the popular methods for beginners and professionals.
So you can use a magnifying glass engraver for pyrography, or you can make your own solar pyrography tool. It might not seem easy at first, but you can definitely master this low-cost method with practice. You can perform some regular pyrography works before moving to glass (or solar) pyrography.
FAQs
What is Solar Pyrography?
Solar pyrography is an art form where sunlight is focused through a magnifying glass to burn designs onto materials like wood, leather, or paper. This eco-friendly technique requires sunlight, making it weather-dependent. It offers precision in creating detailed artwork, similar to traditional pyrography done with a heated tool.
What Materials Can Be Used in Glass Pyrography?
Common materials include wood, leather, and paper. These materials should be light-colored and smooth for best results.
What Kind of Magnifying Glass is Needed?
A large, high-quality magnifying glass with a strong lens is ideal. The size and strength of the lens affect the precision and intensity of the sunlight beam.

