Best Finish For Pyrography – 7 Recommended Finishes For Wood Burning Projects
But which is the best finish for pyrography? Pyrography is not just burning wood to engrave burnt designs on a piece of wood or draw portraits. It is an aesthetic art form, and you would want to give it a perfect glaze and smoothness. You must have been doing some in-depth research on pyrography, which led you here. I will go through some specific finishes for wood burn art.
Any FINISH FOR PYROGRAPHY is case dependent. Varnish is the most popular. You can use varnish, paste wax, polyurethane, etc. You can also apply lacquer, UV inhibitor, and shellac, which are equally effective and popular sealants for preserving wood burning projects for a long time.
You can choose and apply any of these finishes to protect your work from dirt and damage. But like all other things, these sealants also come with their advantages and disadvantages. So my aim to write this article is to ensure you know all about these sealants before applying them to your pyrography projects.
Fantastic Finishes
You wouldn’t want to leave those beautiful pieces unprotected as they are prone to damage without a final touch. So here are some popular sealants that will help protect your hard work and enhance their appearance.
1. Varnish
Ah, varnish! It’s like the trusty old friend in the world of wood finishes. Its composition, a blend of elements like resin, thinner, and oil, makes it a go-to choice for many.
What’s fantastic about varnish is its versatility. It can be as subtle or as bold as you like. Typically, it bestows a clear, protective layer, ranging from a soft sheen to a mirror-like gloss. This adaptability makes it a favorite among woodworkers and pyrographers alike.
And here’s a little secret: while varnish is known for its clear coat, it’s also a bit of a chameleon. By adding pigments, you can achieve various hues, adding a unique twist to your work. Just a heads-up, depending on the type of varnish and wood, it might impart a slight yellow or orange tint, which can be quite charming in its own right.
So, whether you’re finishing a grand dining table or a delicate pyrography piece, varnish can be your reliable ally in bringing out the best in your woodwork.
- Pros
- Leaves a transparent look
- Suitable for getting a glossy output
- Easily available
- Affordable
- Cons
- Low abrasion resistance
- Dries slowly
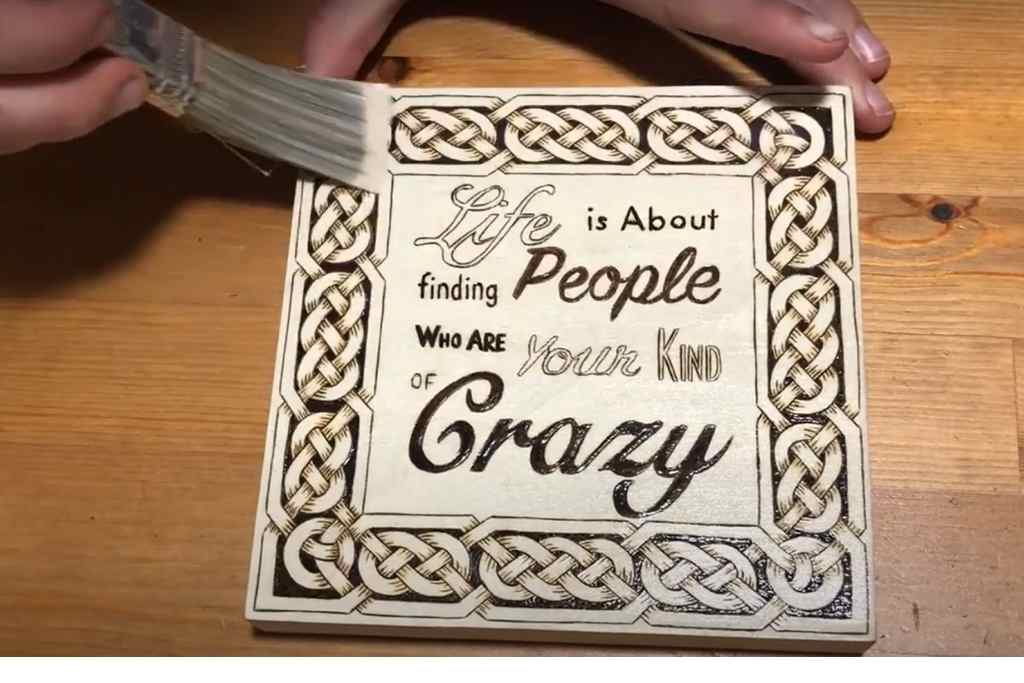
I remember working on a wood burning project, a small intricate piece that I was particularly proud of. After much contemplation, I decided to finish it with varnish. The transformation was remarkable. The varnish not only added a protective layer but also brought out the depth and warmth of the wood, making the details pop in a way I hadn’t anticipated. That was my first sealing work.
2. Polyurethane
It’s like the unsung hero of the pyrography world. I’ve found it to be incredibly effective, especially when I’ve dabbled in painted pyrographic pieces. The beauty of polyurethane is in its versatility. Whether you’re more comfortable with a spray can or prefer the control of a brush, there’s an option that suits your style.
Now, let’s talk types. You’ve got water-based and oil-based polyurethane. Both are great, but if you’re working on a wood burning project, oil-based polyurethane is your best bet. It just has a way of enhancing the wood’s natural beauty while providing that sturdy protection.
Here’s a little tip from my own experience: patience is key with polyurethane. After applying the first coat, give it a good three to four hours to dry. I know, waiting can be tough, especially when you’re excited to see the final result. But trust me, it’s worth it. Once it’s dry, give it a light sanding and then go for the next coat. This process might seem a bit lengthy, but the end result is a smooth, professional finish that really makes your work stand out.
- Pros
- More robust and durable sealer
- Available in spray-on and brush-on types
- Can provide matte to a glossy look
- Affordable
- Cons
- Requires sanding after applying each coat
- Requires multiple coats and takes longer to dry completely
3. Paste Wax
Paste wax is basically a creamy wax for applying to wood. Because of its glossy appearance, the wood appears much shinier than most other finishes. That is why it is often used for sealing pyrography workpieces, as it offers more application control.
There are advantages and disadvantages of wax finishes on wood. Paste wax is usually easier to apply because it is neither a spray nor requires a brush. You can apply it on wood pieces using a clean cloth.
The downside of paste wax application is that it is not as durable as other protections.
- Pros
- Easy to apply
- Offers more application control
- Leaves a natural and glossy look
- Cons
- Cannot protect the wood from dirt, moisture or heat
- Over applying it makes the wood look cloudy
4. Oil
If you are worried about other substances damaging your pyrographic piece, you can rely on an oil finish. Since oil is a natural product, it helps accentuate the grain of your burned wood, adds a glossy look on the burned wood finish.
On top of that, applying oil is pretty simple because you can either use a brush or a clean fabric to wipe it on the wood pieces. You must dry the first coat overnight before applying another coat.
While some people would recommend particular oils for sealing pyrography wood, I say go for any natural oil. These are the best natural finish for wood. And Tung Oil (also known as Chinawood oil) is the most preferred in this class. You can also apply mineral, walnut, lemon, Danish oil, etc., as they prevent water from penetrating into the wood. Oil is my first choice in sealing any pyrography piece.
- Pros
- Less smelly
- Easy and quick to apply
- Affordable
- Cons
- Requires occasional reapplication
- Gathers dirt and dust pretty easily
5. Lacquer
If you want to give your craft piece a durable and robust life, you can go for a lacquer finish, a fantastic wood burning sealer. That is why many professional pyrographers prefer it for sealing their wood burning designs.
The perk of applying lacquer is that you can reapply it without requiring any prior sanding. And you must apply a thinner coat first and then reapply more coats when it dries.
Another advantage of choosing lacquer finish is that you can find it on both brush-on and spray-on forms. But remember to apply this in a well-ventilated area because it has a strong smell.
- Pros
- Does not require sanding
- Available in two application methods
- Dries quickly
- Cons
- Releases a strong smell
- Ages over time
6. UV Inhibitors
If your pyrography piece exposed to the sunlight, it can fade over time. That is why it is best to choose a UV inhibitor if you have outdoor wood burning projects.
And not just sunlight, UV inhibitors are known for protecting pyrography work even from artificial lights. But what is the best way to apply this finish?
Well, it works best if you apply it with a heavy-duty marine varnish coat. Thus it offers better protection if placed outdoors.
- Pros
- Heavy-duty finish
- Offers effective protection against direct sunlight, you can hang the art piece outside without worries.
- Environment-friendly
- Cons
- Direct contact with skin can cause irritation
7. Shellac
Shellac is a type of resin secreted from lac bugs (females). That makes shellac a natural sealant and has no harmful chemicals.
The application method for shellac sealants is pretty straightforward. You apply a first thin coat at first. And then, let it dry for 40-50 minutes before applying another layer.
Though it leaves a natural finishing look on your pyrography wood, shellac has some drawbacks. If exposed to heat, the coating can cause discoloration.
- Pros
- Natural product that contains no harm
- Easy to apply
- Dries quickly
- Cons
- Causes discoloration when exposed to heat
- Not very durable
Check this demonstration video.
Applying The Protective Coats
Worrying about how you can apply a finish on your pyrography piece or sealing wood burning projects properly? Here is a quick guideline that I follow.
- Before starting, I make sure that I have completed all the wood burning projects.
- Since burning wood raises the surface grains, I sand the burnt wood with sandpaper. I always sand it using a gentle and circular motion so that it does not damage the pyrography design.
- I apply the coat
- Whenever I am using a spray finish, I hold the bottle a few inches away from the project piece and spray it in an even pattern.
- If I am using a brush-on method, I make sure to apply a thin, even coat.
- If it is a polyurethane type material, I always pour some of it into a cup and use a brush to apply a thin layer over the wood surface.
- At this point, you have to let the first coat dry completely. Depending on the finish type, the drying time can take an hour to overnight.
- Once the first coat dries, I apply a second coat and let it dry again. You got to follow this procedure to apply the next several required coats.
- After the last coat, it is always recommended to let your piece dry for 24 hours to ensure the sealant takes full effect.
You can watch this video to learn more about applying finish on pyrography woodwork. And you can go through the basics of wood burn arts again if you think.
FAQs
Do I need to seal pyrography wood after burning?
It is not mandatory. But if you want to give your workpieces a smooth and shinier finish and slow the fading, it is best to consider applying a durable sealant.
Should I stain wood before or after wood burning?
You should always stain the wood after burning the wood. Staining wood before burning can produce detrimental gaseous substances.
Does wood burning fade after applying the finish?
While sealing with a finish slows the fading process, it is not uncommon for the burns to fade over time. You can avoid putting the wood piece under direct sunlight as it fades the design much faster. But you can apply UV inhibitors to protect it from fading under sunlight.
How do I prepare for finishing pyrography wood?
Since wood finishing products often emit a chemical odor or strong smell, it is necessary to ensure you are working in an open or well-ventilated area. You must also make sure the wiping fabric or application brush is clean.
Do you sand after wood burning?
It is not mandatory, but you can do it gently. It will help make the surface smoother. You can use sandpapers of different grits for this process. Don’t wipeout your artwork by over-sanding.
Will 2 coats of stain make it darker?
Yes, 2 coats of stain can make wood darker.
How long does burnt wood last?
A woodburn piece can survive centuries ( at least a few decades) if it is sealed off properly and it is not damaged accidentally.
EndNote
Now that you know about the finishing materials and applying methods for pyrography, which one do you think is suitable for you? Which one is better among the brush-on or spray-on application methods?
Actually, it all depends on you because it is your project, and you know how you want it.
And do not stress over the application process because you don’t have to be a professional to apply a finishing product. But make sure to sand the wood (without damaging the art of course!) until it’s smooth before applying the coatings.

