Pyrography Earrings: Stunning Projects in 3 Steps!
In today’s blog post, I will walk you through the process of making simple wooden pyrography earrings.
Stepping into the world of pyrography is fascinating for everyone. If you’re someone who likes wearing jewelry, here’s a project you’re going to love!
While quite easy and satisfying, wooden earrings having this art can also offer a formidable challenge. You’ll need steady hands and pay attention to details to make the project come out pretty. Girls are seriously very conscious about the outlook and quality of the pair.
Let’s explore!

Earrings Burn- Fun Projects
How Do You Make Pyrography Earrings?
Step 1: Pick Your Wood
- Make sure you pick pieces of a kind of wood that is safe for burning
- Pick unseasoned and untreated wood
- If you’ve been using scrap wood pieces for pyrography practice, pick two pieces that are thin and nearly identical in dimension and color
- The wood pieces should be thin and light. However, don’t pick pieces that are so thin that your pyrography pen would burn a hole through it
- You can also buy pre-cut pieces of wood to make the jewelry
Step 2: Pick Your Pen Tip
- Whether you use a craft burner or a woodburning pen, make sure you’re picking the right tip.
- Your surface for an earring is going to be pretty small, so get yourself a tip for making lines, and maybe one for even finer detail works
- Even if you’re planning to shade, it’s best to not use tips that are too wide, unless you’re making unusually big pieces!
Step 3: Start Off Steady
- Prepare your tools for the work
- If you’re doing this for the first time, pick a simple pattern.
- I suggest drawing some simple lines and geometric forms directly on the earring base instead of transferring intricate patterns to it
- Heat up your pyrography pen and with patience, trace the lines
- You can also do a dotting motion over the lines for some texture
- After the basic outline is done, you can try shading some of the sections

Once you’re done with outlining, stippling and shading, you can color some of the sections as well. Then it’s just a matter of attaching the earring base with an S-hook and wearing it!
Amazing Patterns For Burning
I am sharing a lot of photos in this articles. All were very special and each design has a small story behind it. I did them in 2022, but still I have a few pairs with me to enjoy the idyllic and grand designs.
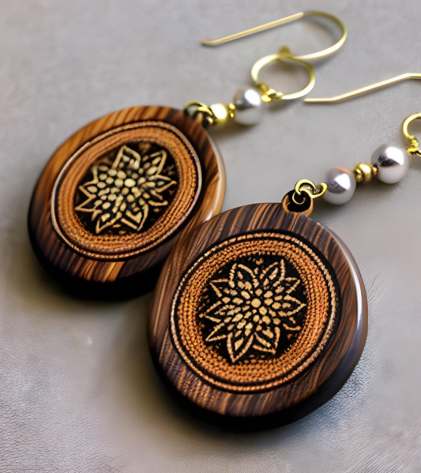
Vintage Art
- Random but complex patterns burnt on the flat surface
- The rounded border is darkened and varnished, giving it a vintage look
- You can choose any abstract pattern for burning
- Time required may vary from 30 to 50 minutes for each one
- But it took a lot of time for me to finish the two for the special darkened circular rims.
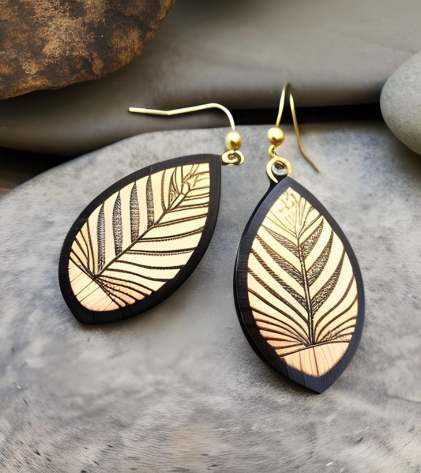
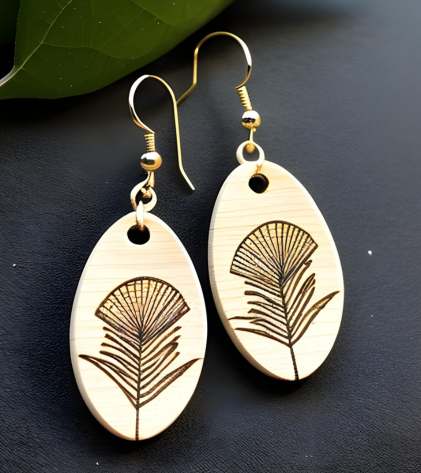
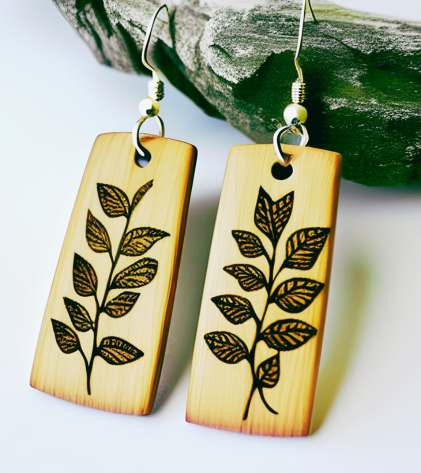
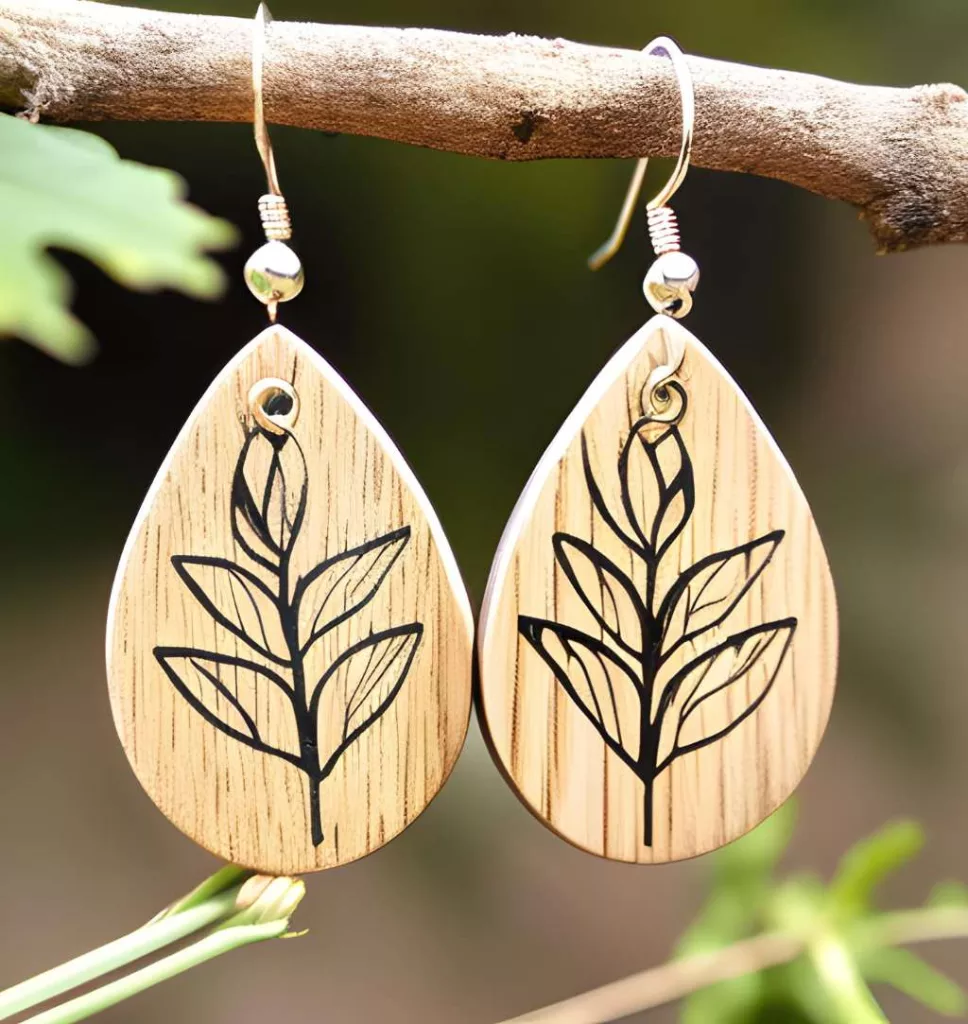
Leaves Patterns
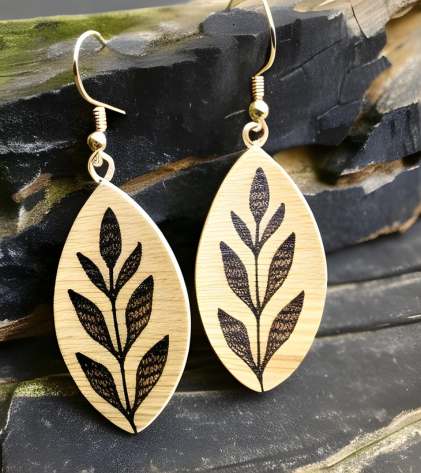
- This is a very adorable yet simple design. This is my favorite pair. And I wear them on very special days.
- The leaf shaped earrings contain leaf shaped burning art
- Any woman wearing this pair will have a decent look.
- Time required: maximum 1 hour for both the parts. But the image below has a more complicated art and will require at least one hour more. But the borders on the second pair made it fit for any party jewelry.
- The third pair having bamboo pattern is an awesome pair of jewelry and will look great if you wear it with other color-matched clothes.
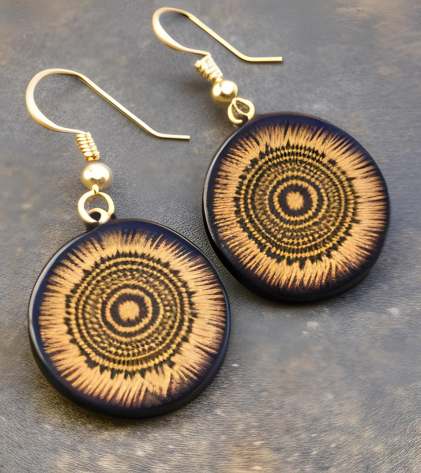
Circles And Dots
- You can do this simple art form by transferring the patterns or stippling over the surface.
- Circular patterns will turn into mandalas if you have good skills.
- This project may consume 45 minutes to 1.5 hours for burning.
- Easy for beginners.
Forest Landscape
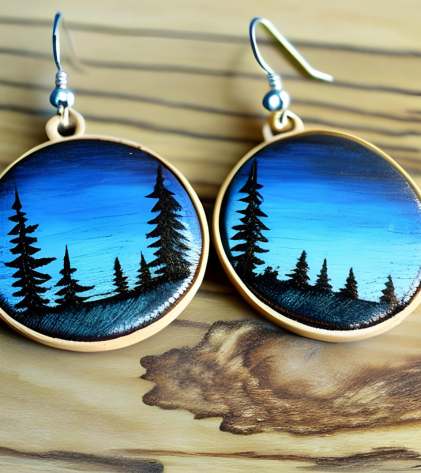
- Forest outlines can be very simple to complex. You should choose a simple one like conical tree line against the horizon.
- The coloring and shade variations of the sky will make it attractive for women of all ages.
- It requires good amount of dexterity to execute such a small project so beautifully.
- I was very much excited while doing this project. The aqua and pale blue shades made them stunningly beautiful.
Dark Floral Burns
- This is suitable for pro-level burn artists.
- The design is very complicated and time consuming.
- You need to be careful enough to make so many variations in design along different radius of the circle.
Butterfly On Diamond
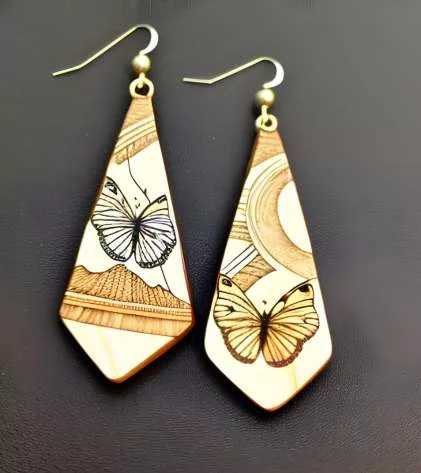
- Diamond shaped jewelry make the women look more trendy and dynamic. I am fond of all the simple and elegant designs like these. I have gifted this pair to my niece. She wore them on the first day of her high school classes.
- The designs are asymmetric ( they are not mirror images), it has added more dynamism and open-mindedness for the wearer.
- Though the design looks very simple but it has very thin and sharp burnt lines, these are tough to achieve by any non-professional artists.
- These are perfectly suitable for any party or family occasions.
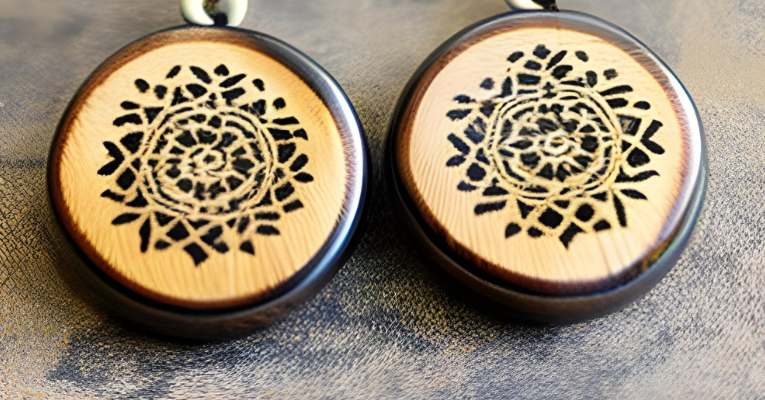
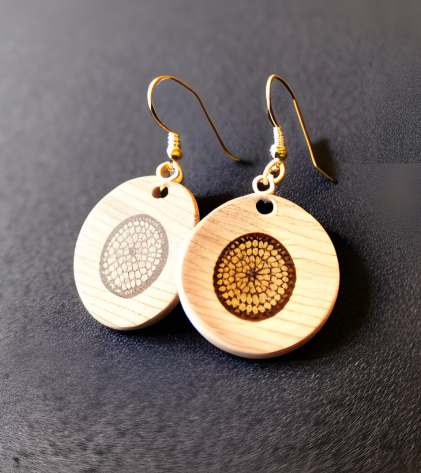
Simple Mandalas
- Mandalas are always preferred over any other design for woodburning artists.
- This kind of mandalas are very simple to make and burn.
- You do not need to transfer the patterns. But a few circular outlines will help you to make the concentric circles steady.
- The outer edge should be burnt into thick and dark perimeters of inner circles, it adds prominence in the designs.
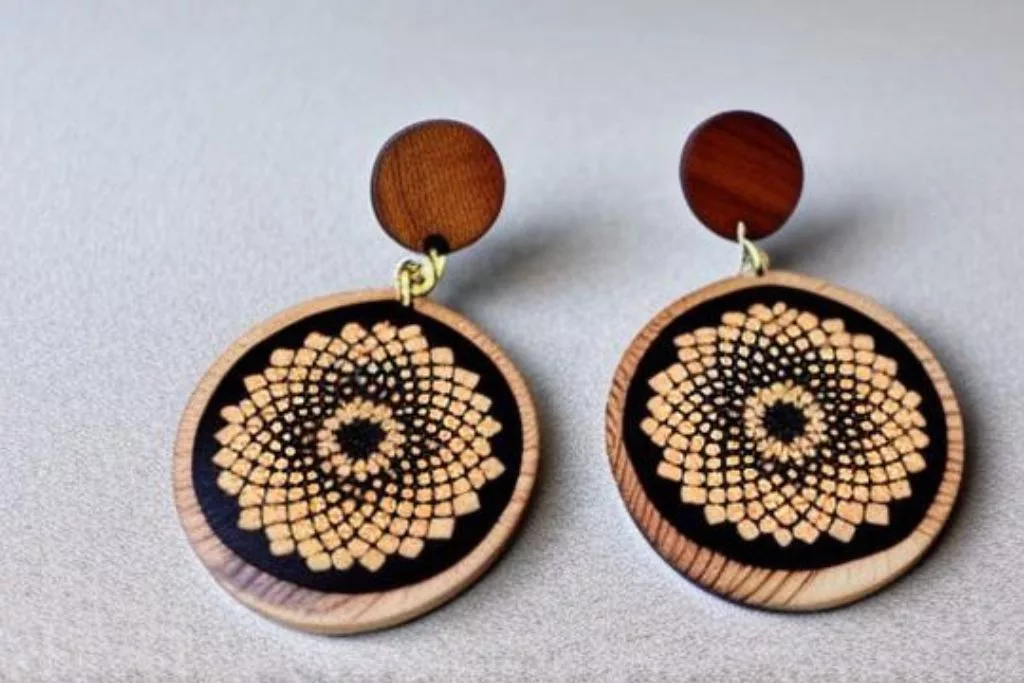
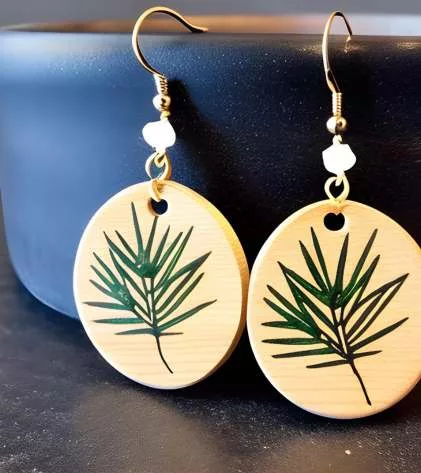
Flowery Plants
- This is indeed a very idyllic and on-the-go pattern. Someone took the pair from me for US$25. This is way more than the average price. Happy here!
- It can be worn by any students to women at work where the wearer prefers simplicity in fashion.
- Making such a burning pattern is not a problem at all even if you are a novice wood burning enthusiast.
- Project completion time varies from 40 minutes to 2 hours.
Pine Trees
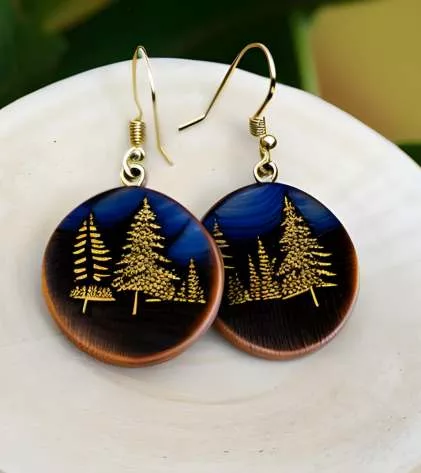
- Pine trees having a bit complex patterns are used here. I made three pairs, sold two. And I am fondly keeping one pair with me for any evening party.
- The ambience resembles a blue shade of evening. But the golden leaves of the pine tree gives a vibe of any festival where trees are decorated with lights.
- A huge portion of negative space burning adds prominence of the trees.
Shark Fins
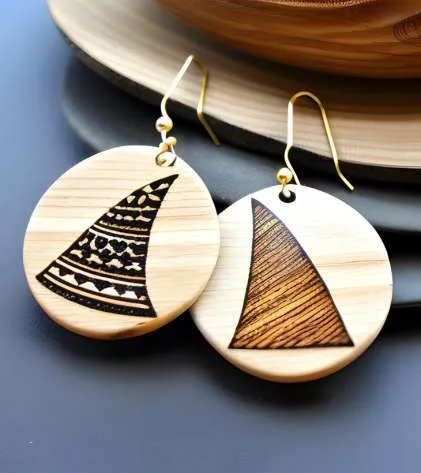
- This is again an asymmetric pattern if you compare the two wooden disks.
- Any shark enthusiast will love it like a treasure.
- You can add different patterns on the fins as you wish.
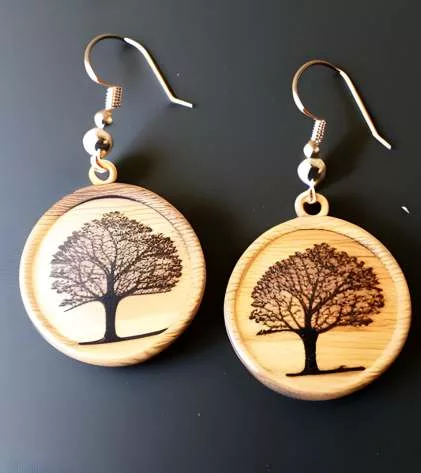
Tree Silhouette
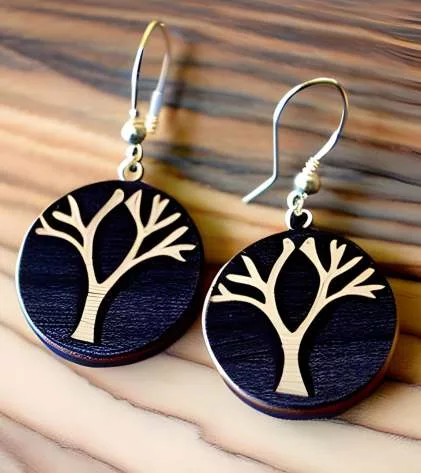
- Tree silhouettes are symbols of nature and aristocracy.
- The entire area except the tree trunk and branches are burnt, making the void a negative space. This act added prominence of the trees.
- Time required – 2 hours to 3 hours for burning only.
Stinking Corpse Lily

- A stinking corpse lily is not something welcoming for many people, but there are a lot of nature lovers who like the diversity of flora and the existence of obnoxious natural smells.
- Burning this pattern is not hard. And you have the freedom from not making the patterns into mirror images. It was an easy task as there were no pressure to make it symmetric. I chose it to be random.
Eyes
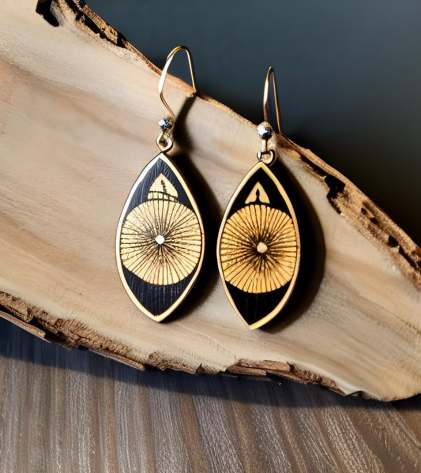
- The eye design burnt on the jewelry are not something formal, but it is an expression of the wearer’s freedom.
- The design above has a lot of burnt negative spaces.
- It will not take more than 2 hours to complete the pair.
Vines
- Very simple vine patterns are made here.
- But the shapes are something extraordinary.
- You have to be careful about the identical shape of both the wood pieces. But the designs are not symmetric at all.
- It can be done by beginners as well.
Carving And Burning
- It is a very special as wood burning is done on a carved surface.
- The realistic trees are very hard to burn as they contain the silhouette of small leaves and micro level branches.
- Suitable for professional pyrographers.
- The accuracy level of the design tells that it will take at least 3-4 hours for each of the piece.
Jewelry From Scrap Wood
- Above one is made from scrap wood.
- The simplicity of the art has given it a decent but stylish appearance.
- You can be creative on the wire/metal part attachment.
Here’s a very easy wood burnt earring video tutorial for you. You can watch another one directly here.
We have another fun video here.
Additional Resources
Conclusion
While the process of adorning a pair of earrings with pyrography may sound easy-peasy, you’ll find that it’s quite a challenge! You’ll need to make the pieces nearly identical (if you don’t purposefully make them different), and also avoid burning through the wood! Moreover, the surface is pretty small. All in all, I think making these ornaments will be a good way to use scrap wood and also for learning delicate hand motions in this art.
Have you made them this way before? Let me know in the comments!