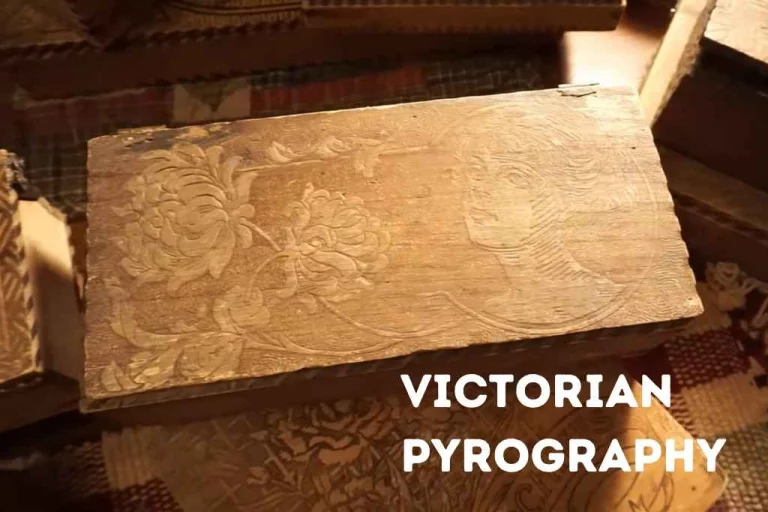
‘Pyrography On Plywood’ Details And 11 Amazing Design Ideas
Plywood offers a great surface to start woodburning. All you need now are some great designs. Look no further, for we’ve curated for you the most elegant and unique ideas for pyrography on plywood. Check out the list below.
Technical Things
You should be aware of the technical issues and the engineering aspects of plywood prior you start burning projects on them. It will help you not to generate any frustration on your fun-burn project by choosing the right quality thing. I had to study a bit to make the notes. But, I can assure, you won’t regret reading it.
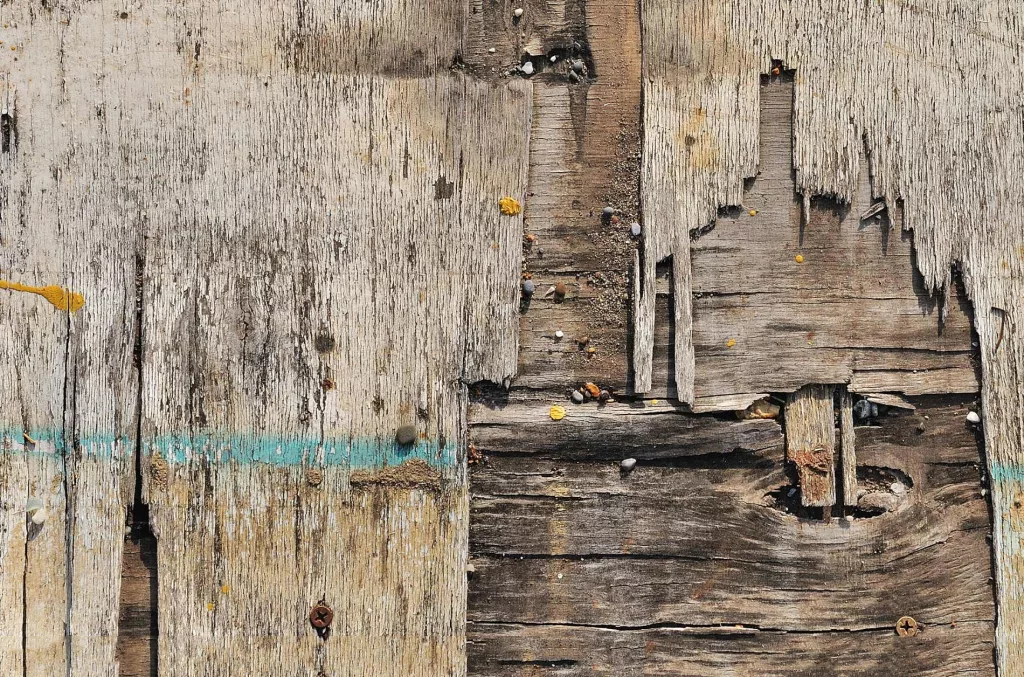
This is a photo of worn out veneers, for you to recognize the material at the first look.
What Is This Material Actually?
- It is made by layering thin sheets of wood veneer together with adhesive, creating a strong and stable structure.
- The veneer sheets are cut from logs using cutting machines and dried to reduce moisture content and enhance stability.
- An odd number of veneer layers are stacked with alternating grain direction to create plywood, ensuring strength and resistance to warping.
- Adhesive, often resin glue, is applied to each veneer layer, and pressure is applied to bond them together securely.
- After the glue cures, the panel is trimmed to the desired dimensions.
- The final material comes in various thicknesses, sizes, and grades to suit different applications.
- It offers versatility, strength, and cost-effectiveness, making it a preferred material for many projects including
- It is widely used in construction, furniture-making, cabinetry, packaging, and crafting. Doing burn art on this material is seriously loved by many woodburn artists.
Quality Of The Material

I am always careful while I am choosing any plywood for woodburns. It saves me money, time and energy.
When it comes to woodburning, the choice of wood species can significantly impact the quality of the results. The selection should consider not only the suitability for burning but also the surface quality for achieving fine details and smooth burn lines. Here are some wood types that are generally well-suited for pyrography, along with a few that may present challenges due to surface quality:
Best Wood Types For The Project
- Birch: Birch wood is a popular choice due to its light color, even grain, and smooth surface, which allows for precise and detailed burn marks.
- Maple: Maple wood is another excellent option. It has a fine, tight grain and a smooth surface that facilitates precise burning and detailed work.
- Basswood: Basswood is a favored wood for pyrography, known for its light color, fine grain, and soft texture, which allows for easy burning and shading techniques.
- Poplar: Poplar wood, with its light color and relatively smooth surface, is suitable undoubtedly. It can provide good results with detailed designs and shading.
Wood Types with Limitations
- Oak: While oak can be used for the burn, its prominent grain pattern can make it challenging to achieve smooth, detailed burn lines. It may be better suited for designs that embrace and incorporate the grain texture.
- Pine: Pine wood is soft and can have a more pronounced grain pattern, which may affect the precision of burn marks. It is still possible to work with pine, but it may require more care and control.
- Mahogany: Mahogany has a tight grain and can produce good burn results, but its darker color may make burn marks less visible. It can still be used effectively for designs that aim for a darker, contrasting appearance.
It’s worth noting that the surface quality of plywood can vary depending on the specific product and grade. In general, selecting high-quality material with a smooth surface, such as birch or maple plywood, can provide a better canvas for pyrography work. And that are my personal choices.
I can recommend you to experiment with different wood types to find the one that suits your artistic vision and style the best.
Advantages And Disadvantages Of Plywood As Canvas
Advantages
- Availability: It is readily available in various thicknesses and sizes, making it easily accessible for pyrography projects.
- Cost-effective: It is generally less expensive than solid wood, making it a more affordable option for these projects.
- Smooth surface: It tends to have a smoother surface compared to natural wood, allowing for more predictable and precise burn marks during the process.
- Stability: The cross-grain construction of plywood enhances its stability and reduces the risk of warping or splitting, providing a reliable surface for woodburning.
Disadvantages
- Varying quality: The quality can vary, and lower-quality plywood may have imperfections such as voids, patches, or uneven layers, which can affect the burning process and the final result.
- Limited depth: It typically has a limited thickness, which means you have a restricted depth to work with when creating burn marks. This may limit the intricacy or depth of detail you can achieve in your pyrography designs.
- Charring risk: It can be more prone to charring compared to solid wood, especially if excessive heat or pressure is applied during burning. Care must be taken to avoid charring the surface.
- Glue lines: Depending on the quality, there may be visible glue lines between the layers. These lines can affect the appearance of the burn marks and may require extra care during the process.
It’s important to note that while it offers certain advantages and disadvantages for woodburning, many pyrography artists still achieve impressive and beautiful results on this material. With practice, proper technique, and careful selection of high-quality plywood, you can create stunning artworks.
Special Notes
- The glue lines are typically present between the layers of veneer and are not usually visible on the flat surface. When working on the flat surface for pyrography, you should not encounter visible glue lines.
- However, it’s important to note that depending on the quality and type of plywood, there may be occasional instances where glue lines are slightly visible on the surface. This is more likely to occur with lower-quality material having veneers of uneven thinness.
- If you are using high-quality base with well-bonded veneers, the glue lines should not be a significant concern for your burn work on the flat surface. You can focus on creating your designs and burn marks without being obstructed by visible glue lines.
Some General Tips
Follow these guidelines for a better result when doing woodburning on plywood-
- Protect the surface beneath your working medium with a sheet of cardboard to prevent any accidental burns
- When you’re finished, seal the surface with a clear coat of varnish to protect the burn work and to make it more durable.
- Keep the wood burner moving to avoid concentrated heat in one area, which can cause discoloration or damage otherwise.
Stunning Burn Ideas To Do On Layered Veneer
Rooster Pattern
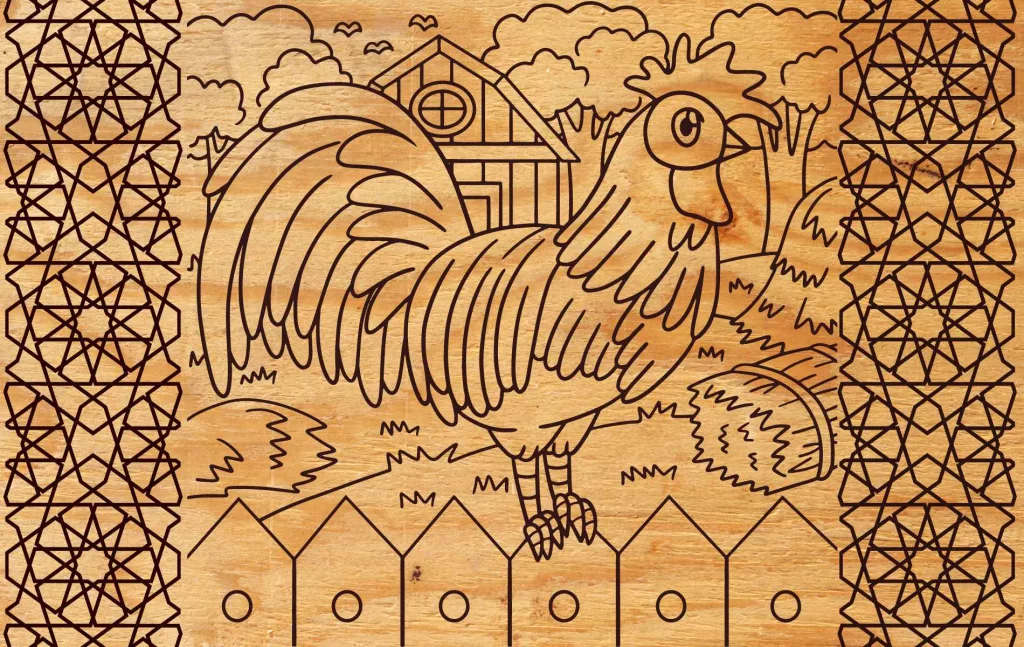
- Beginner to intermediate level wood burn art
- I have drawn an outline of a rooster sitting on a farm’s fence is burnt on this material. It is better to use a stencil for this if you are a beginner. If stencils are not available, you can always use carbon paper for transferring the pattern. More importantly, the contrasting outlines of some geometrical motifs on two sides have added amazing attraction to the art. It was not in my mind at first, but failing to find some filler material, I finally added the geometric grills. And the result is stunning!
- It took 8 hours to complete the burn prior applying sealants
- Great for restaurant or farmhouse decorations
Abstract Art
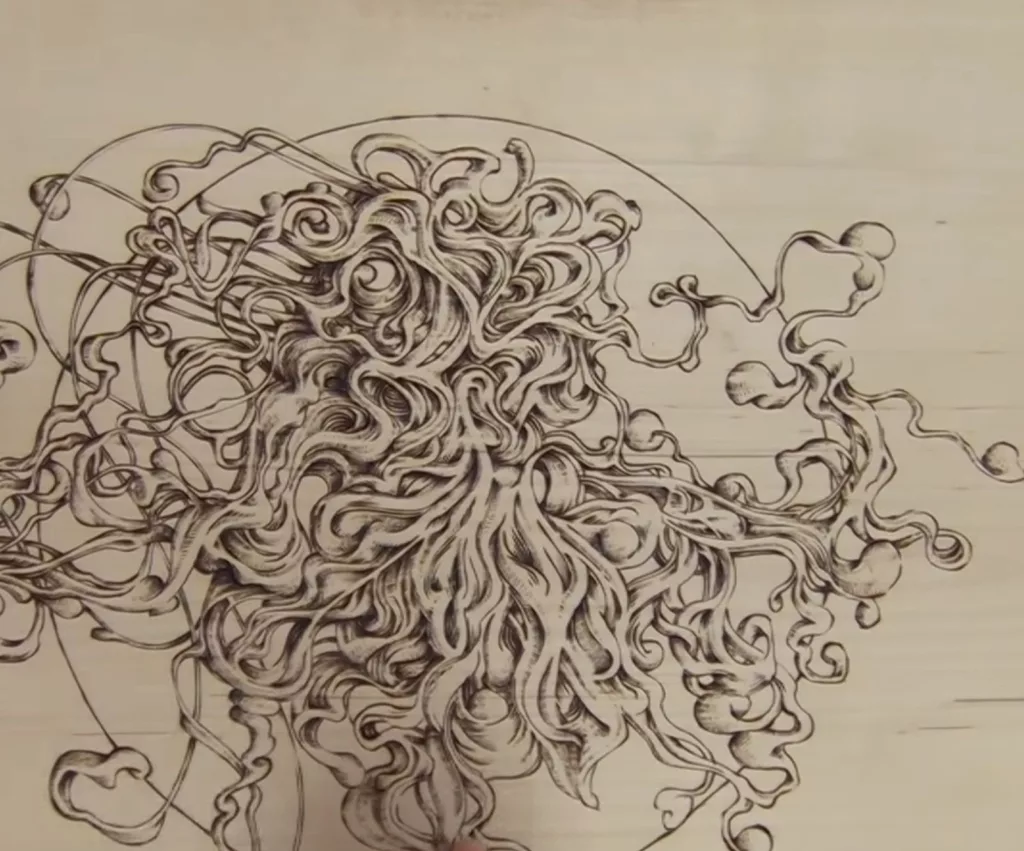
- Only skilled and professional artists can dare to do this
- This is forest themed, but you can add moon, stars, sun, gemstones, clouds etc.
- Time Taken: 7 days
- Excellent for room décor
Moose Shape
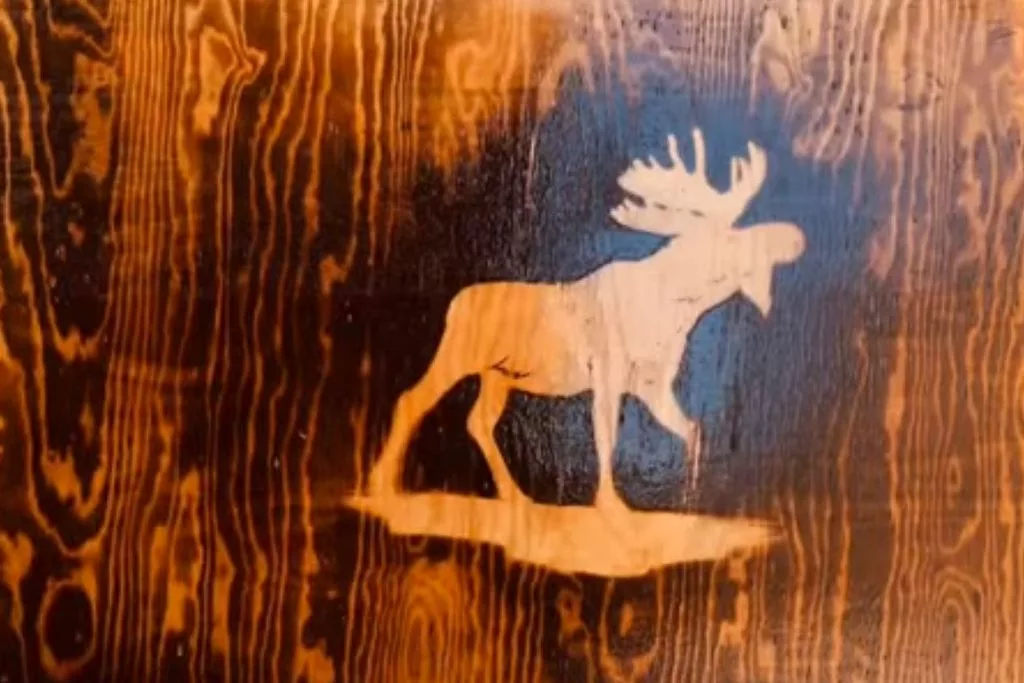
- Professional level work, it is using negative space or void as burn area
- Reversed silhouette design
- Used stencil and hot air blower
- Great for wall décor
- Can be given as house warming present
Reindeer
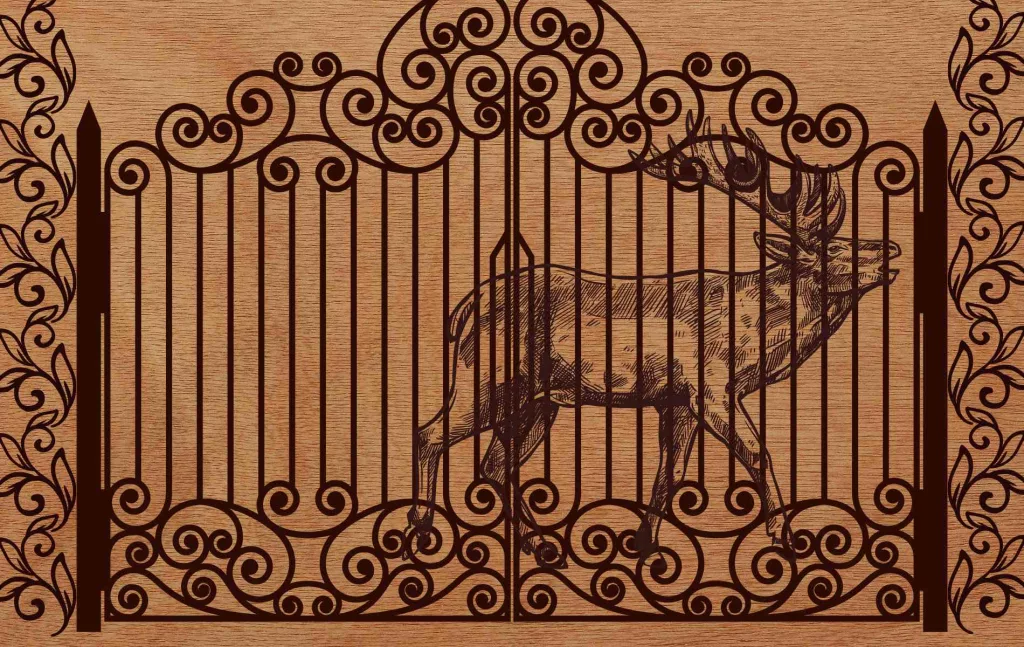
- Intermediate to professional woodburn artists are suitable for this work. It was a big challenge for me to burn it. It was made of Mahogany veneers. The challenge was the considerably uneven surface due to the grain lines of the board. My solution was to spray water mist first, then I kept it for 1 hour to let the surface visually dry again, but my target was to have semi-soaked top fibers. I sanded it then lightly. And bingo! That was perfect to start the burn.
- Basic outline with several layers of burning
- Time Taken 2 days
- Suitable for living room or lounge décor
- Can be gifted to animal lovers
Human Figure
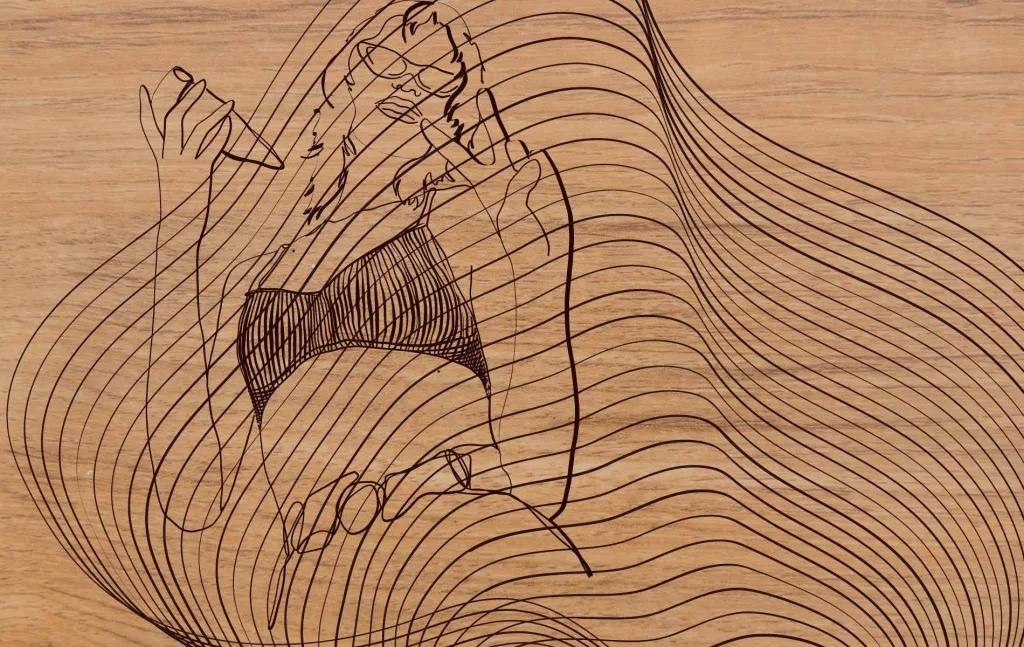
- Intermediate to professional level artists can do it
- Abstract, cloud, sun, sea wave, human figure, animal figure you can include. I have added a lot of converging and diverging curves on top of the outline of the young lady
- It took me 1 full day to complete
- Excellent for wall hanging
Nature
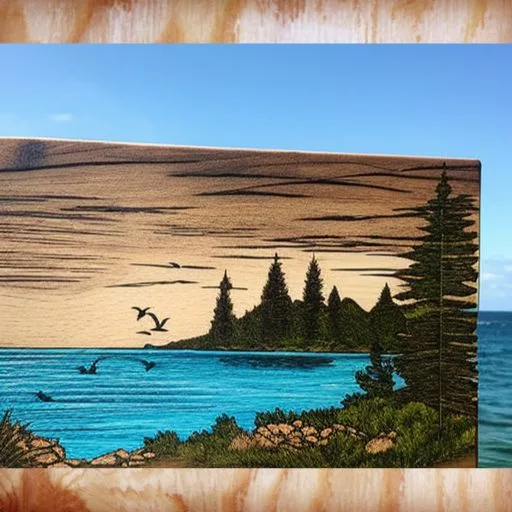
- Requires a high level of burning skills
- Trees, mountains, etc. natural elements with colors added to this
- At least 4 working days are must to do this level of detail project
- Best when done by free hand
- Suitable for both décor or as gifts
Christmas Themed
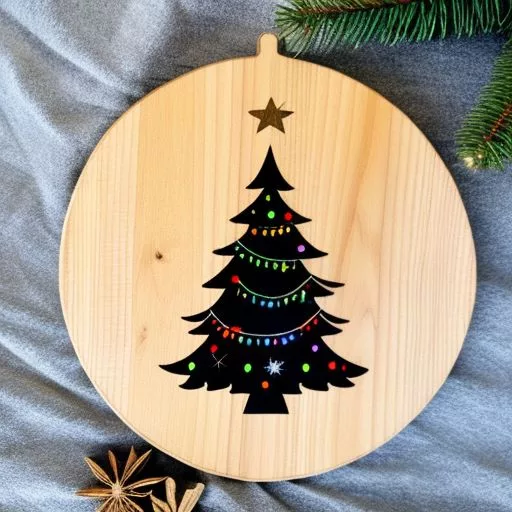
- Beginners to intermediate level work
- Simple outline and silhouette
- Time Taken: 4 hours
- You can add color to make the piece more exciting
- Use as Christmas décor or presents
Decorative Floors
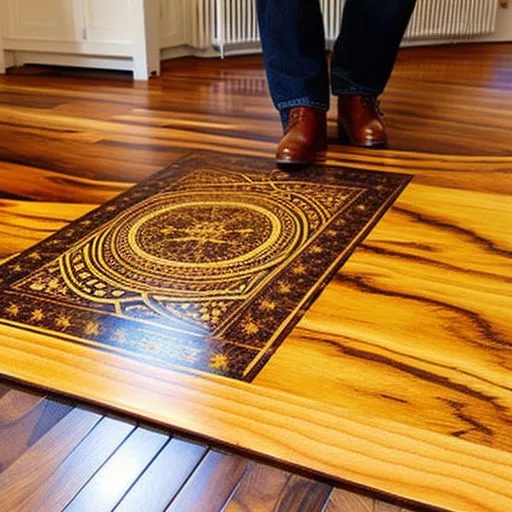
- Very advanced and professional level art on floor can be made like that on the image.
- Heavy detailing at some points, but overall needs to be
- Time Taken: 2 to 3 hours
- Best for wall hanging, especially in lobbies or guesthouses
- You might need to use blow torches to burn large areas of floor.
Mouse
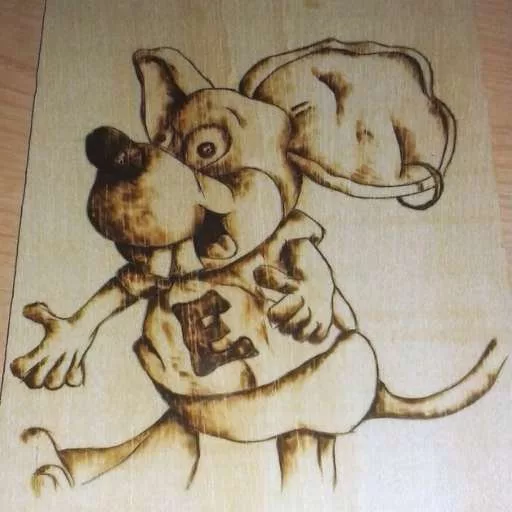
- Not a beginner level work. Any halfway learner or skilled pyrographer can do it smoothly
- Any type of rodent outline
- Time Taken: 2-3 hours
- Most suitable for wall hanging and mantlepiece décor.
Portraits
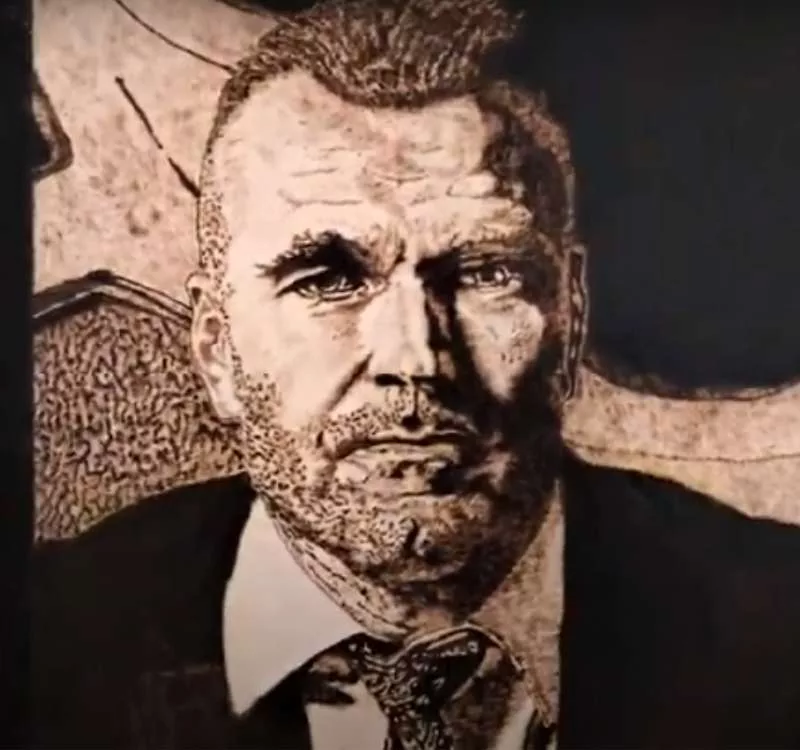
- Super experienced burn artists are necessary for this project
- Realistic portrait
- At least 3 full days required to do this burn art
- If you are good at sketch, you can do it. These are very well accepted among people
- Excellent as wall décor
Here’s an amazing video of portrait pyrography on a plywood board.
Realistic Horse
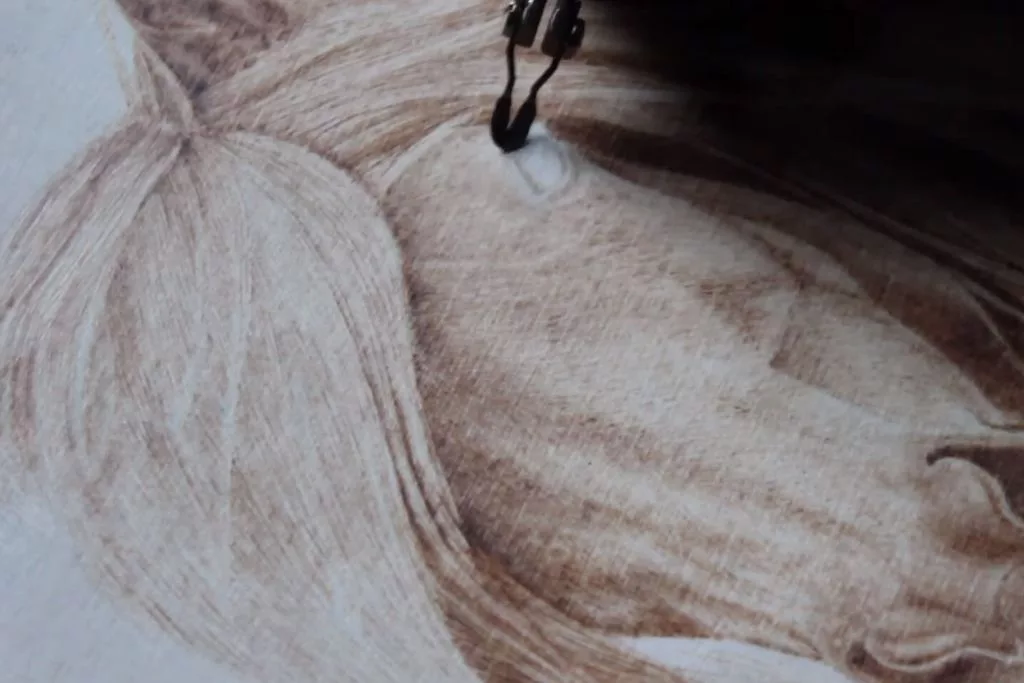
- Professional pyrographers are the only ones who can do it
- Realistic horse pattern with a lot of realistic fur and shadings used
- At least 2 weeks needed for this
- You can do it if you have mastery on using a big variety of burner tips
Here’s a video on birch plywood pyrography.
Final Words
Hopefully, our list of unique patterns for woodburning on plywood have inspired you to create some of your own. Just take an idea, and add your creativity to it.
Additional Resources
- You can check these patterns (that are free to download and print) on plywood.
- Best wood, you can think of, for pyrography
- Worst wood for woodburn art
FAQs
What is plywood made of?
It is composed of multiple softwood veneers glued together.
Is plywood safe for woodburning?
Yes ,it is safe if you are wearing mask. This material may contain substances (paraffin wax as glue for the veneers) that produce toxic fumes upon burning down the next layer. So, make sure to wear a mask doing the project on this medium and do not over burn.
At what temperature does plywood burn?
It burns between 230° to 302° F. You can follow this article on temperature chart for pyrography.
How do you burn wood art with a torch?
You need to use the torch properly from a constant distance. Also, you have to use a brush and a finisher once you have finished using the torch.