How to Transfer Pyrography Patterns to Wood: 5 More Ways
As you are getting more serious on the art of pyrography, the need to know deeper than the surface level wood burning basic ideas is becoming prominent.
Since you’re here, you must be looking for ideas on how to transfer pyrography patterns to wood! There are indeed a number of methods to transfer patterns, but they vary greatly in difficulty and cost.
Some transfer methods take too long or need too many materials. However, there are also efficient and hassle-free methods to transfer patterns
In today’s blog, I have gathered 5 quick and easy ways you can get the patterns on your wood and start burning right away. These ways are fairly straightforward and can be relatively inexpensive in the long run. Let’s take a look, shall we?
Transfer Patterns to Wood
I have talked about transferring patterns to wood in the most basic of ways here 8 Pyrography Pattern Transfer Methods. You can use carbon or graphite paper, or use pencil tracing to transfer the pattern. Other than those, these are the best methods–
Inkjet/Wet Ink Transfer
Those of you who have access to an inkjet printer, you’re in luck. This is one of the easiest ways to transfer patterns in only a few steps.
You can use a few different types of paper for this, such as Inkjet paper, photo paper and heat transfer paper. The trick is to use a paper that’s slippery enough to not absorb the ink.
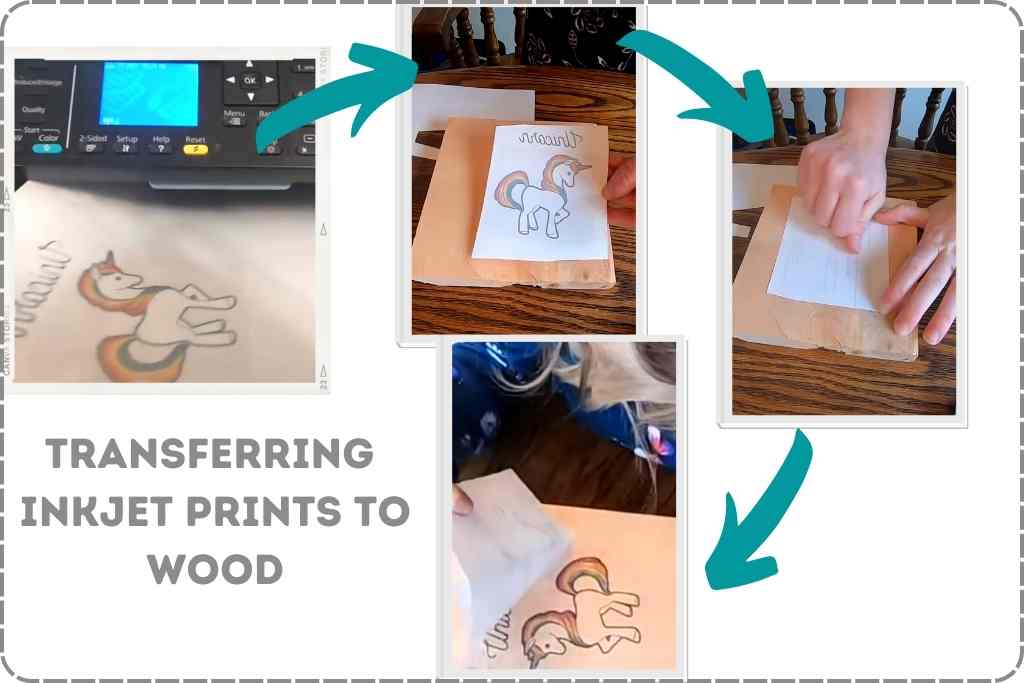
Method:
- Reverse your pattern into a mirror image.
- Use the smooth side of the paper for printing it out.
- Carefully align the paper and place it face down on the wood while the ink is still wet.
- Press down firmly to stamp the ink on the wood surface and remove the paper.
Voila! You should have a traceable pattern ready to burn. Try to place the paper properly in one go without smudging. Otherwise you will need to sand down the misplaced ink before trying it all over again.
You can have a visual demonstration in this video
Transfer Tip
Yup, you guessed it! For this method, we’ll use the specific pyrography nib or tip called the transfer tip. This is a wonderfully practical nib for solid-point burners that simplifies the whole process of transferring patterns.
To make it easy for you to identify, this nib has a flat tip that basically functions as an iron to transfer the pattern with heat. Remember, you must use Laser printer for the pattern to transfer.
Method:
- Reverse your pattern into a mirror image.
- Print and place the paper face down on the surface.
- Tape it down to avoid any mistake.
- Repeatedly rub over the paper with the hot transfer nib until the pattern is fully transferred.
This should give you a very accurate and clear pattern on the wood surface. This is an excellent option for patterns that are detailed and hard to trace. Be careful of mistakes during the transfer, the imprint won’t be easy to erase.
Flat/Spoon Shader
This works the same way as the Transfer tip, but for wire-nib burners. Fair warning– it is slower to use shader tips due to the flat area being so small. But for the same reason, the imprint shows up better and clearer.
Method: Same as the method for transfer tip.
Isopropyl Alcohol
This method is similar to using acetone for transferring patterns. The alcohol is supposed to help the ink release from the paper and absorb into the wood.
Method:
- Reverse your pattern into a mirror image.
- Print and place the paper face down on the surface.
- Tape it down to avoid any mistake.
- Wet a Q-tip or cotton piece with Isopropyl alcohol and gently press down on the paper repeatedly to soak it.
- Check from time to time to see if the pattern is transferring well until it’s done.
The imprint is usually faint, so avoid using this method on dark wood surfaces.
Blue Chaco Paper
If you don’t want to use carbon or graphite paper for some reason, blue Chaco paper is a great alternative. You can use it as a tracing paper the same way, but with the added benefit of being easy to erase.
- Attach your pattern paper on the lighter side of the Chaco paper, opposite of the blue side.
- Tape both paper on the surface with the blue side of the chaco paper facing down.
- Trace the pattern firmly and check to see if it is transferring alright.
- Remove the papers after the tracing is done.
You can simply wipe off the excess imprint with a damp cloth after the burning is done.
Conclusion
You probably already knew a bit about how to transfer pyrography patterns to wood, but these 5 methods are the simplest. If your focus is on the burning and you just wanna get past the pattern transferring, these are your best options. Happy burning!